How To Install WordPress on WP Pro Plan?
Step1. Login to z.com account, https://cloud.z.com/mm/signin/
Step2. Click the “WordPress” Menu
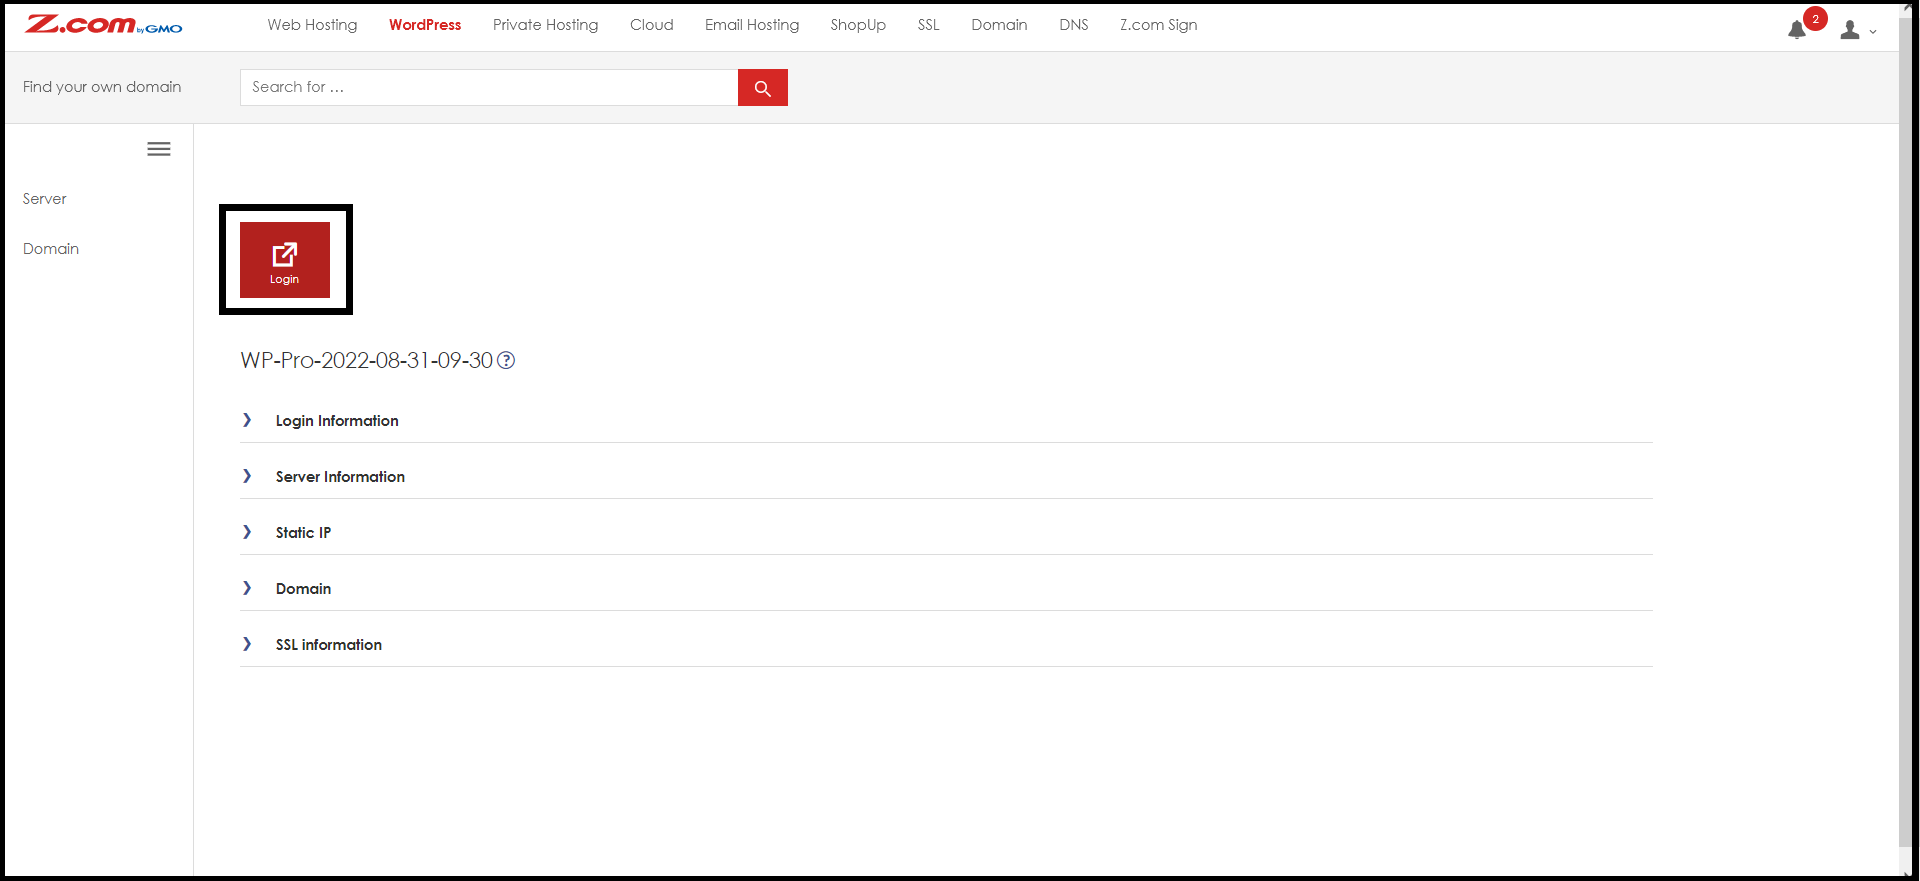
Step3. Select your “WordPress Pro Server” Under the Name Tag

And then, Click the “Login” Button to enter the cPanel
Now, you need to add a domain on cPanel to install the WordPress site
Step4. Please select “Addon Domains” under the “Domains” Menu on cPanel
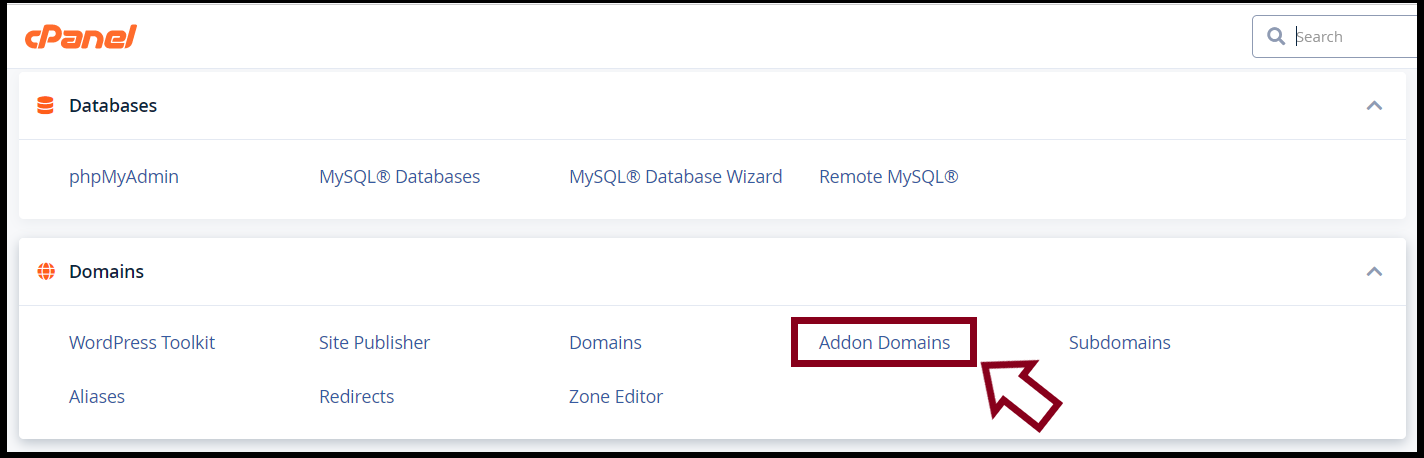
And add a domain as follows then click “Add Domain”

Now the domain is added on cPanel successfully then click “Go Back”

After adding a domain on cPanel, you can install the WordPress Site.
Step5. Select “WordPress Toolkit” Under “Domains” Menu

Step6. Click “Install WordPress” via WordPress Toolkit on cPanel

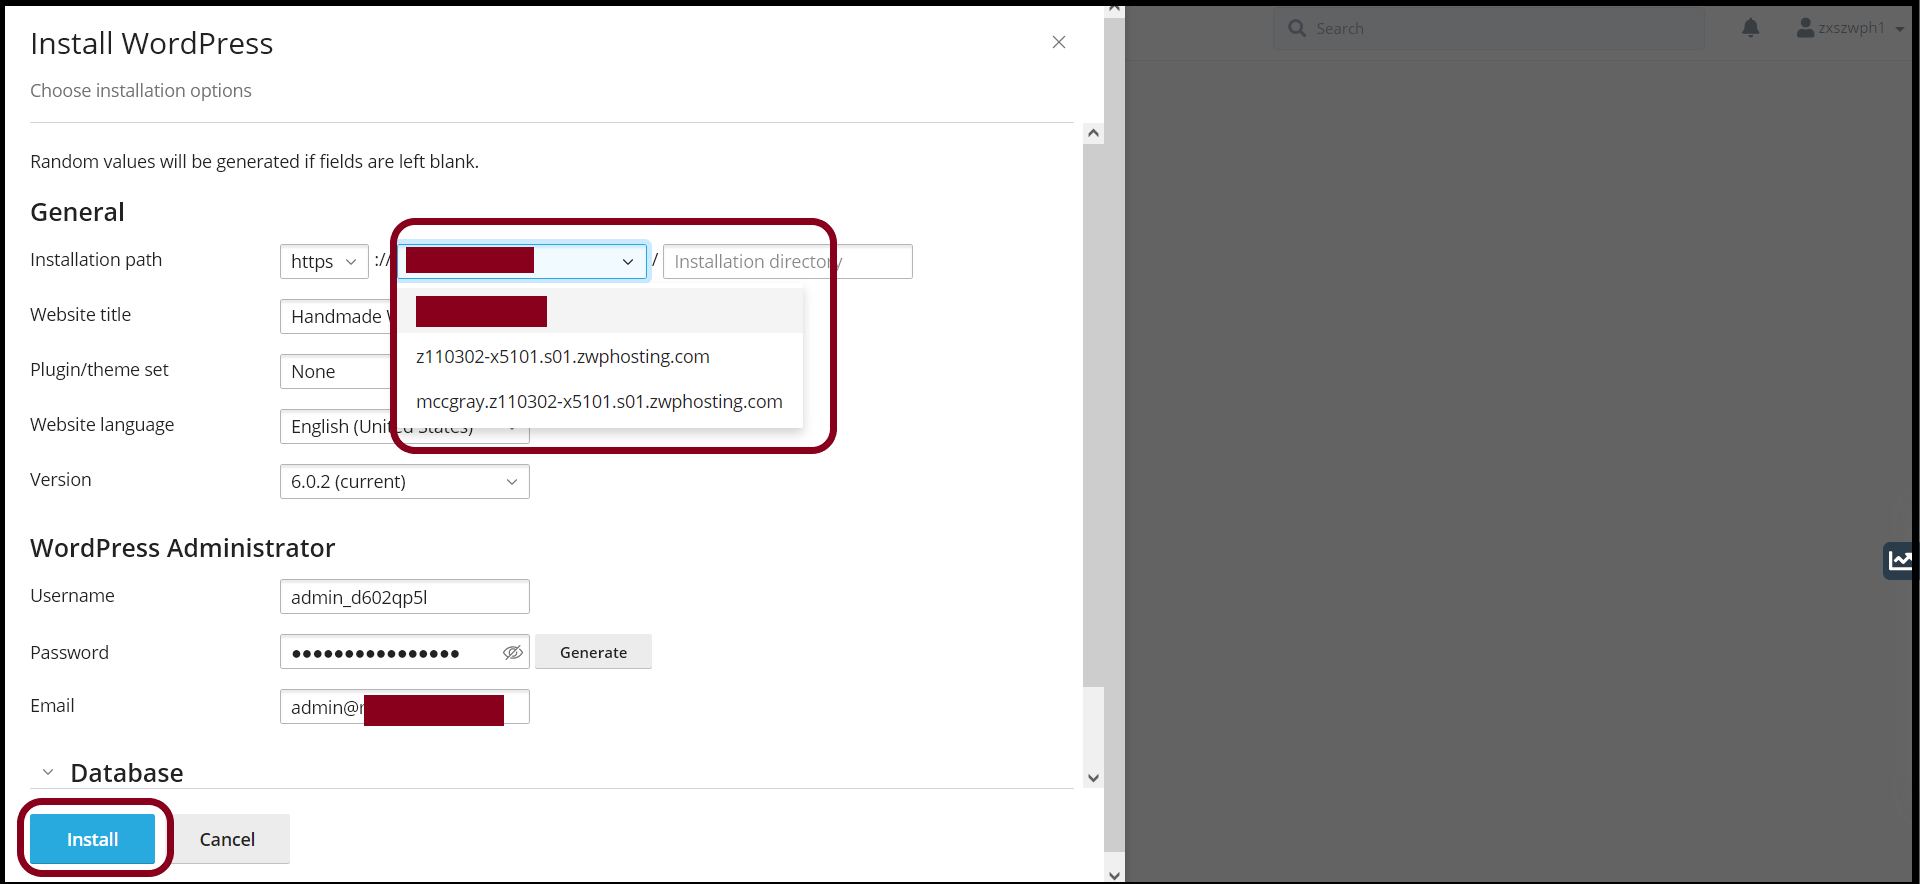
Step7. Setup the General Setting as follows
- Select your domain name on the Installation Path
- Setup the WordPress Administrator Information and Database
- And then, click “Install”
After that, The WordPress installation process is in progress, and click “Show Details” to check the WordPress Installation.

Then you can check the Installing WordPress for a few minutes

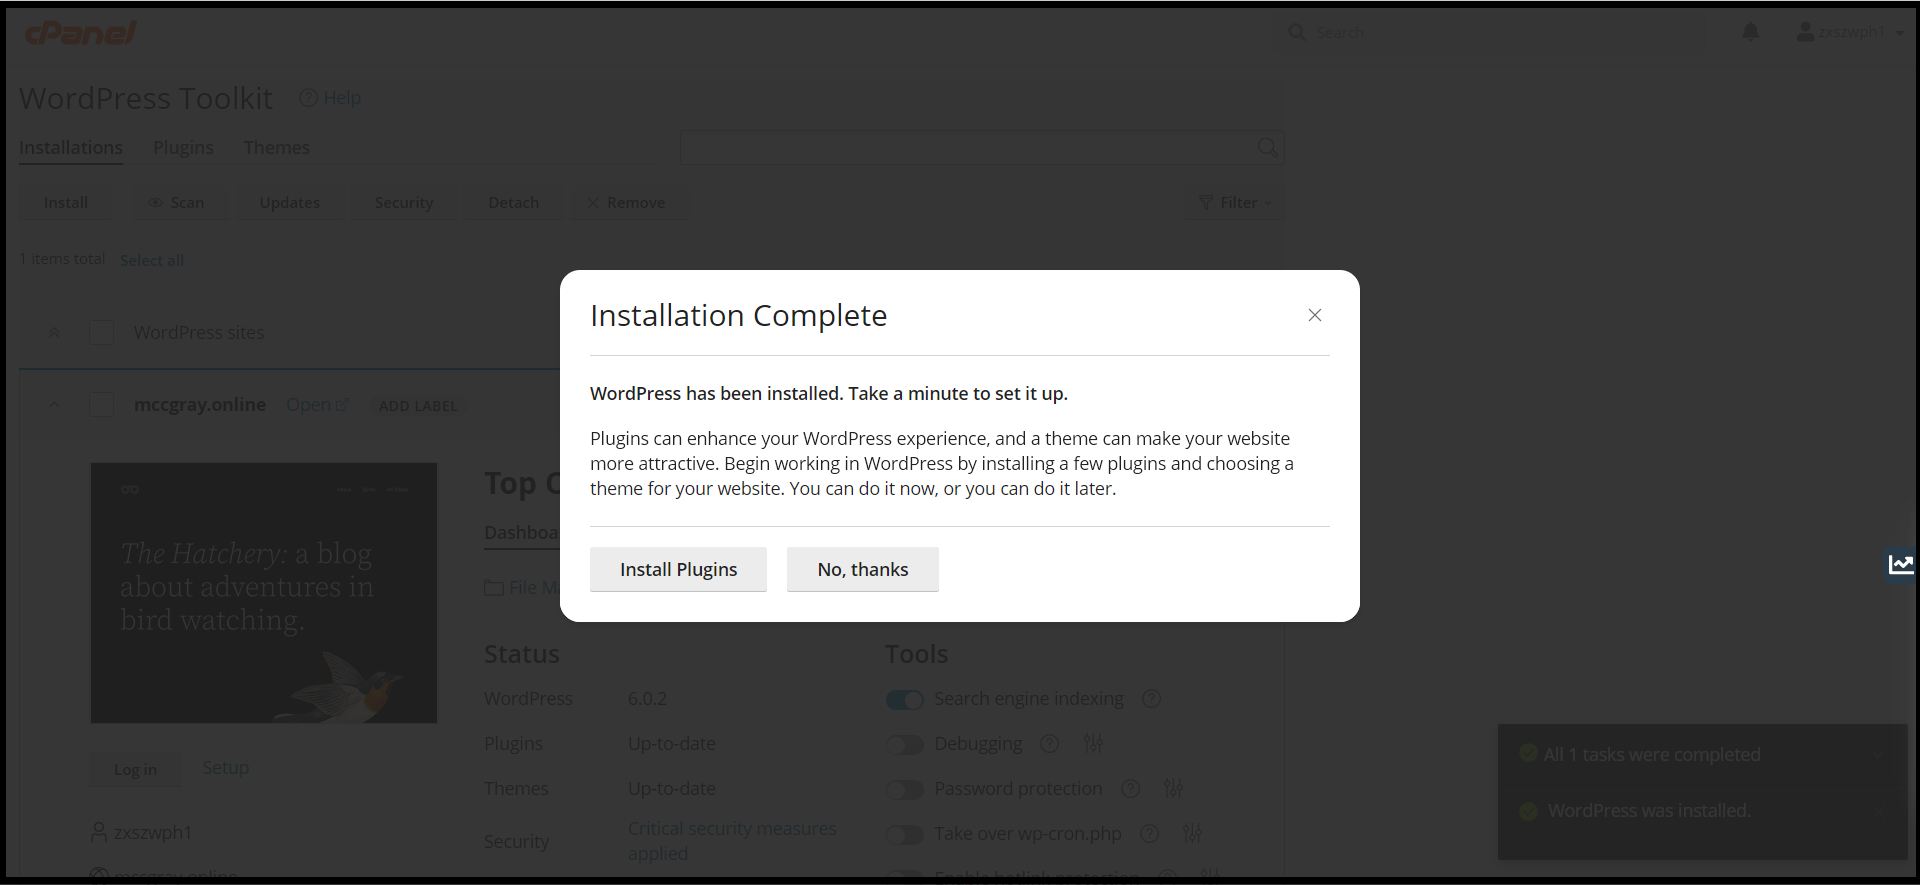
Finally, The WordPress Installation was completed, and Can “Install Plugins” that you prefer
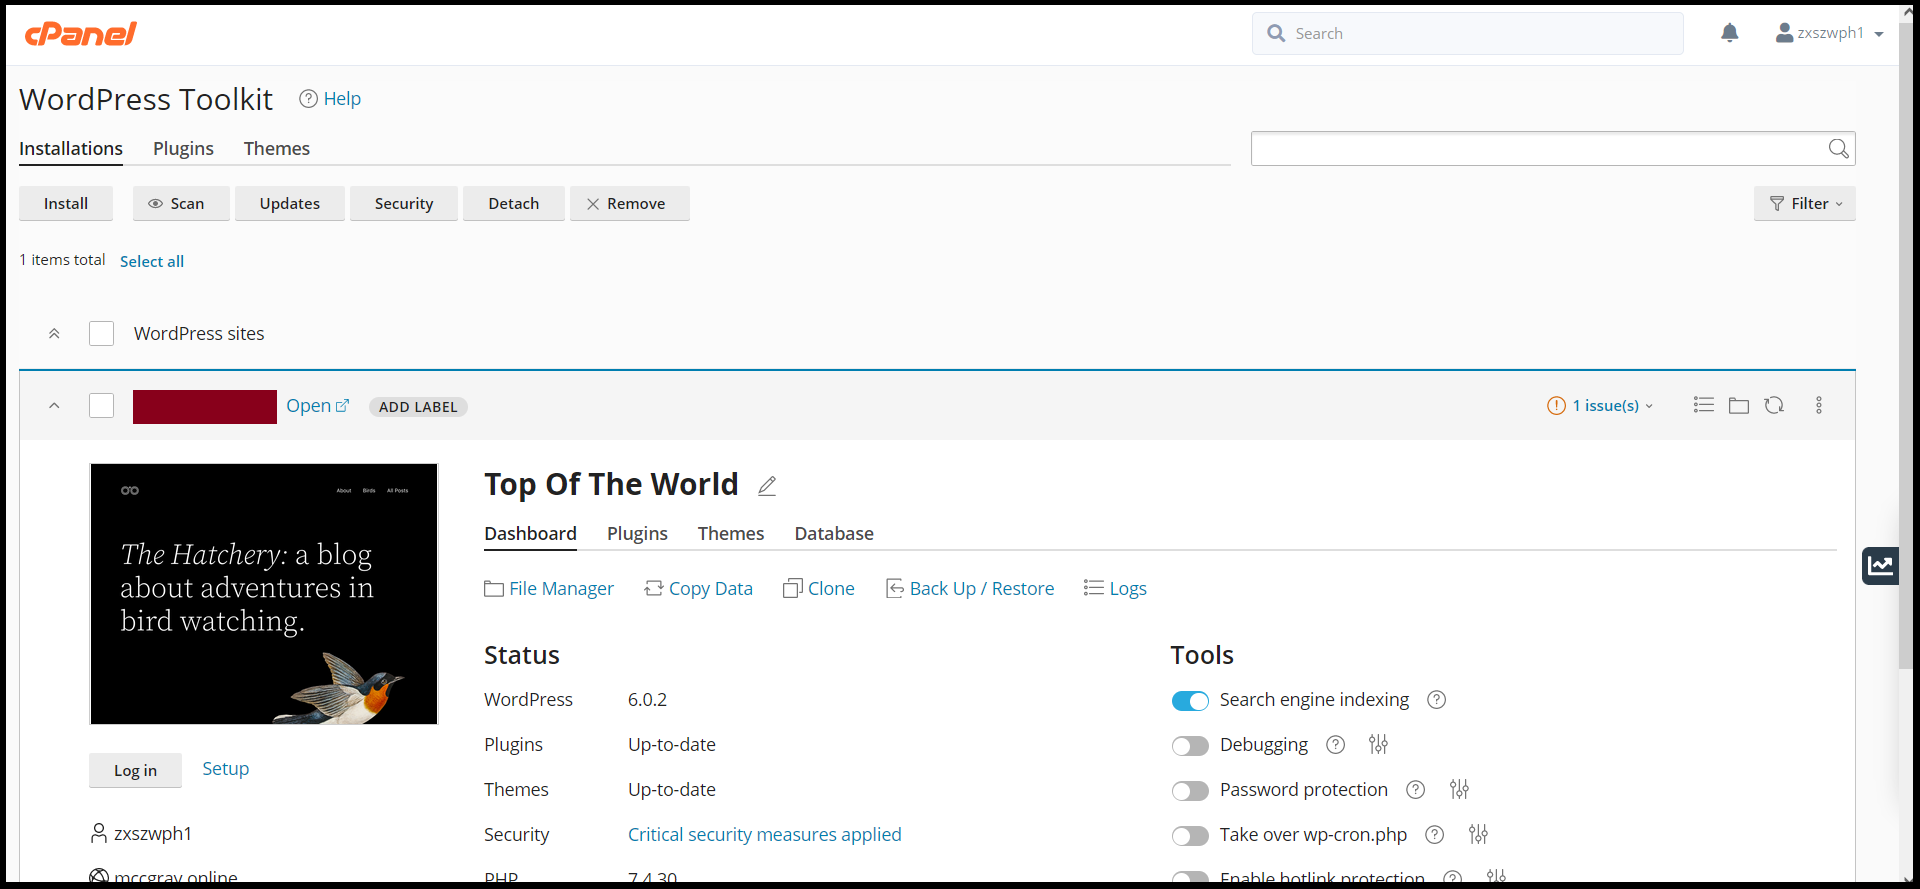
Now, you can also check the WordPress Site on WordPress Toolkit
Thank you!!!
Was this article helpful?
That’s Great!
Thank you for your feedback
Sorry! We couldn't be helpful
Thank you for your feedback
Feedback sent
We appreciate your effort and will try to fix the article