How to initial set up Private Hosting Plesk Panel in MM4?
Step1. Login to z.com account, https://hosting.z.com/mm/signin/ 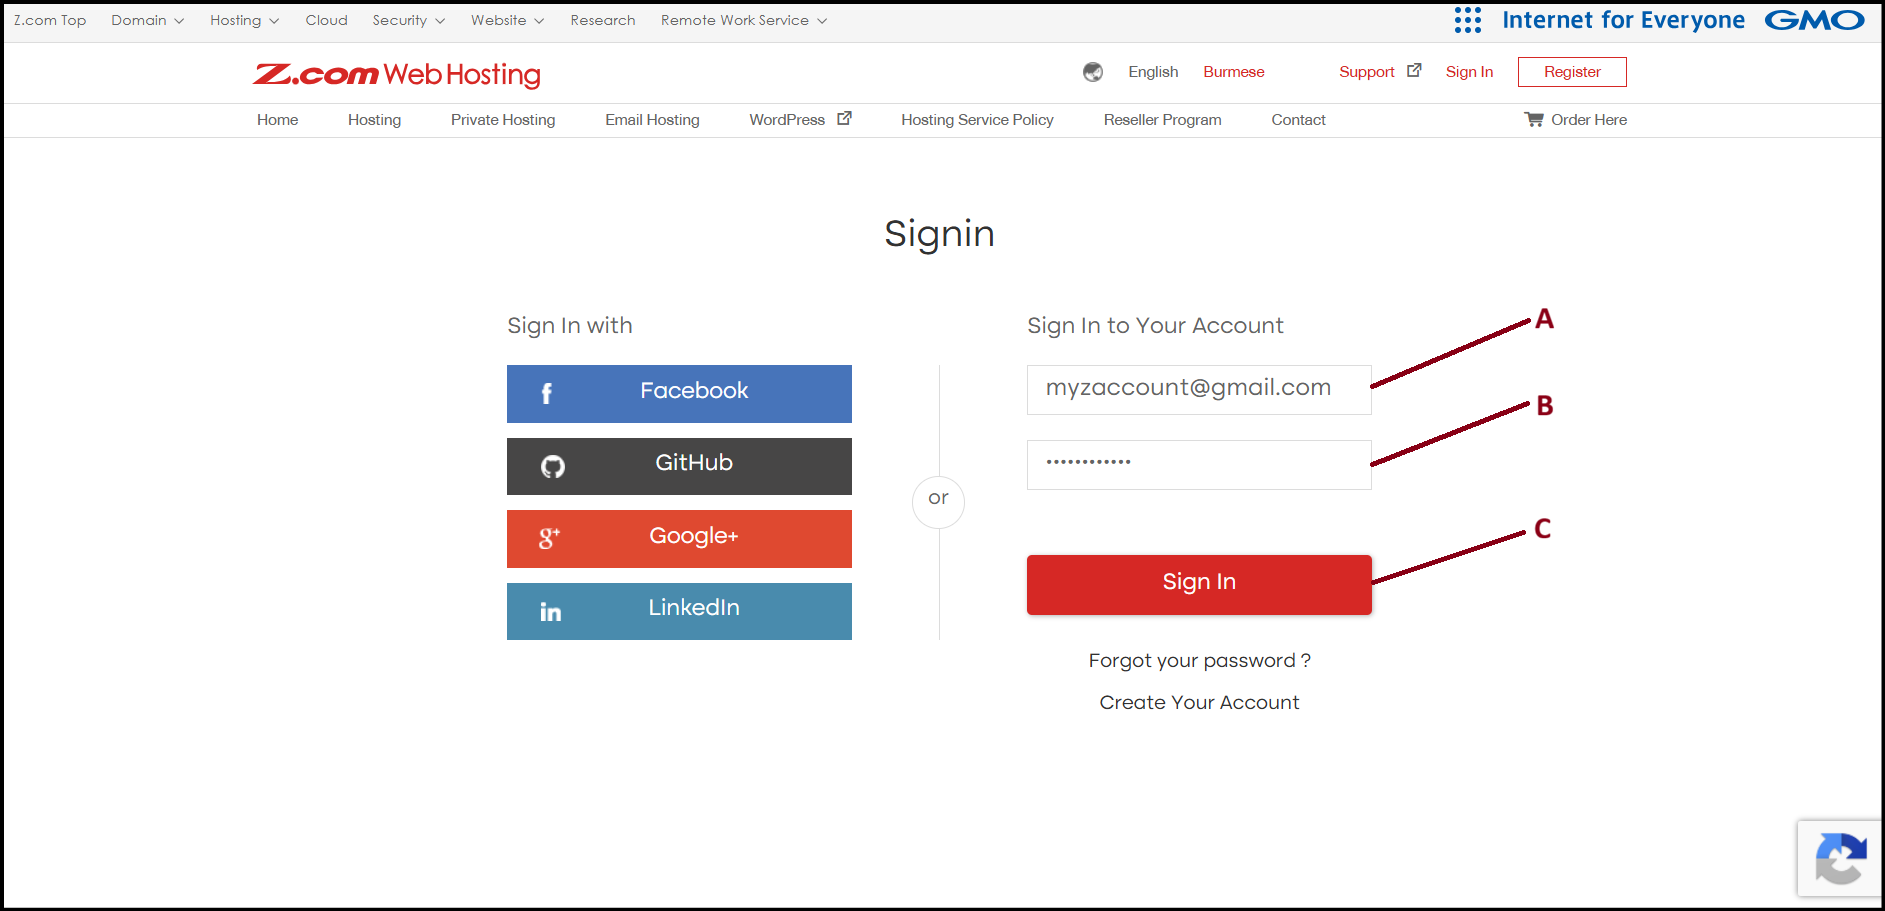
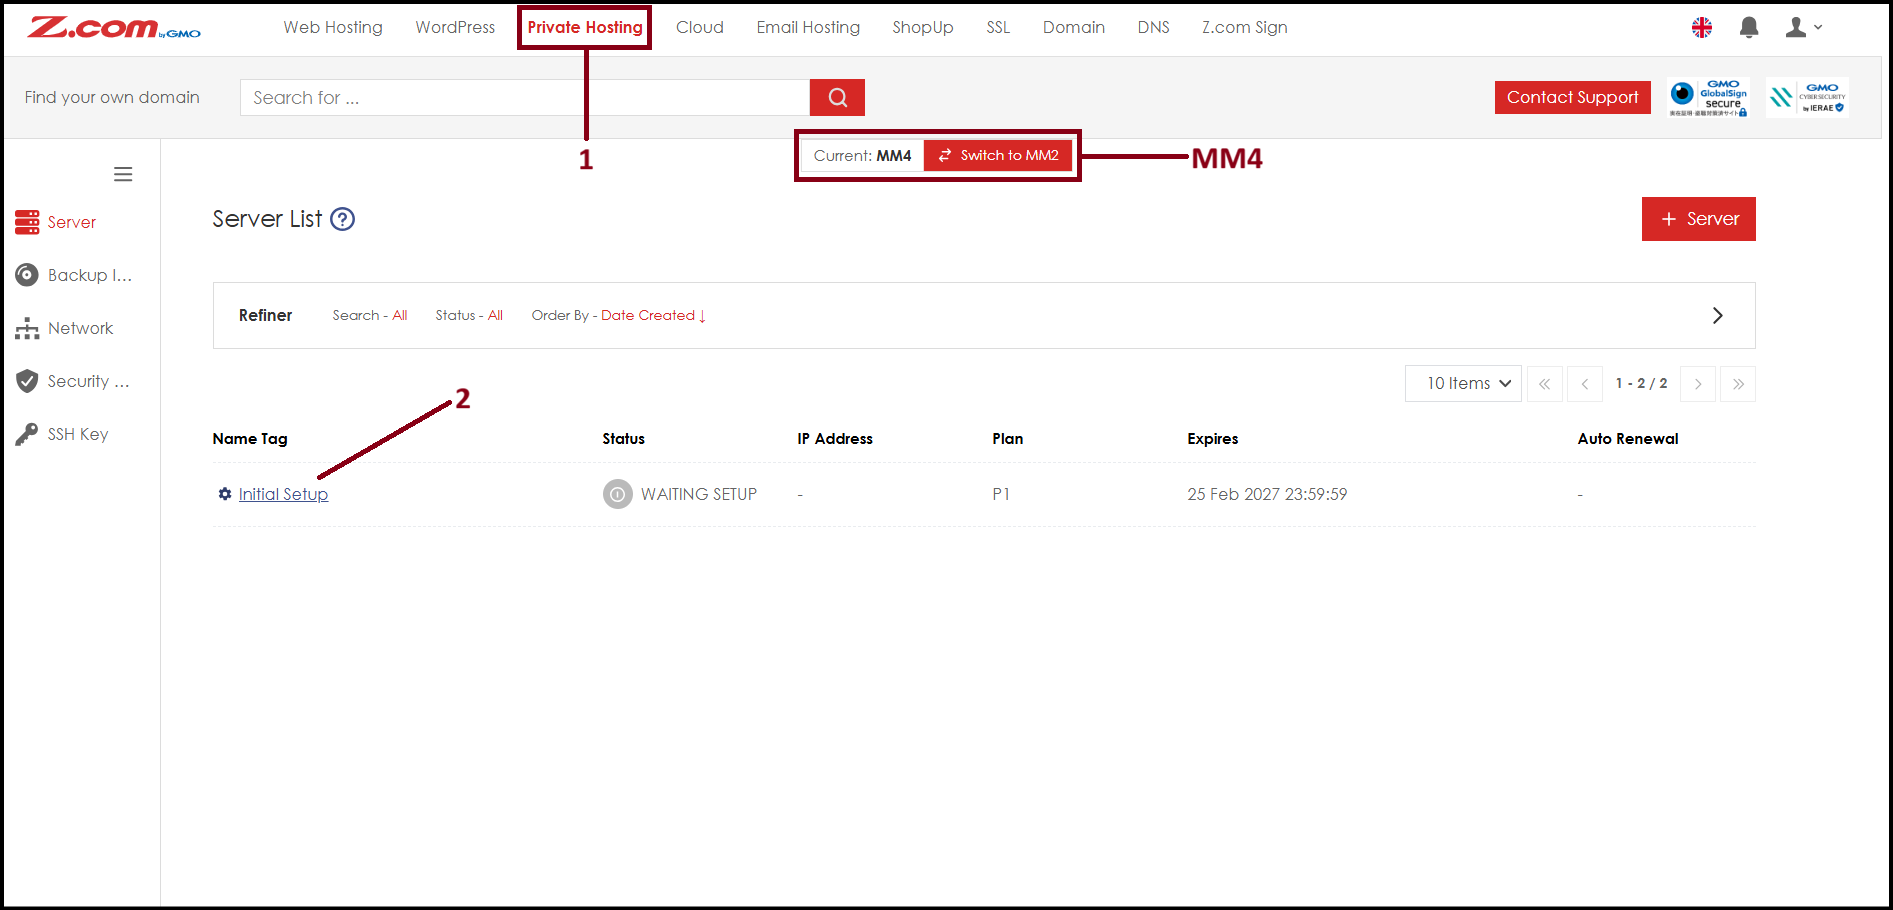
Step2. Go to the "Private Hosting" tab under MM4. And click "initail Setup".
Step3. Create Root passwod and click "Save" . The Root password will be use for both Plesk login and server console/SSH login. 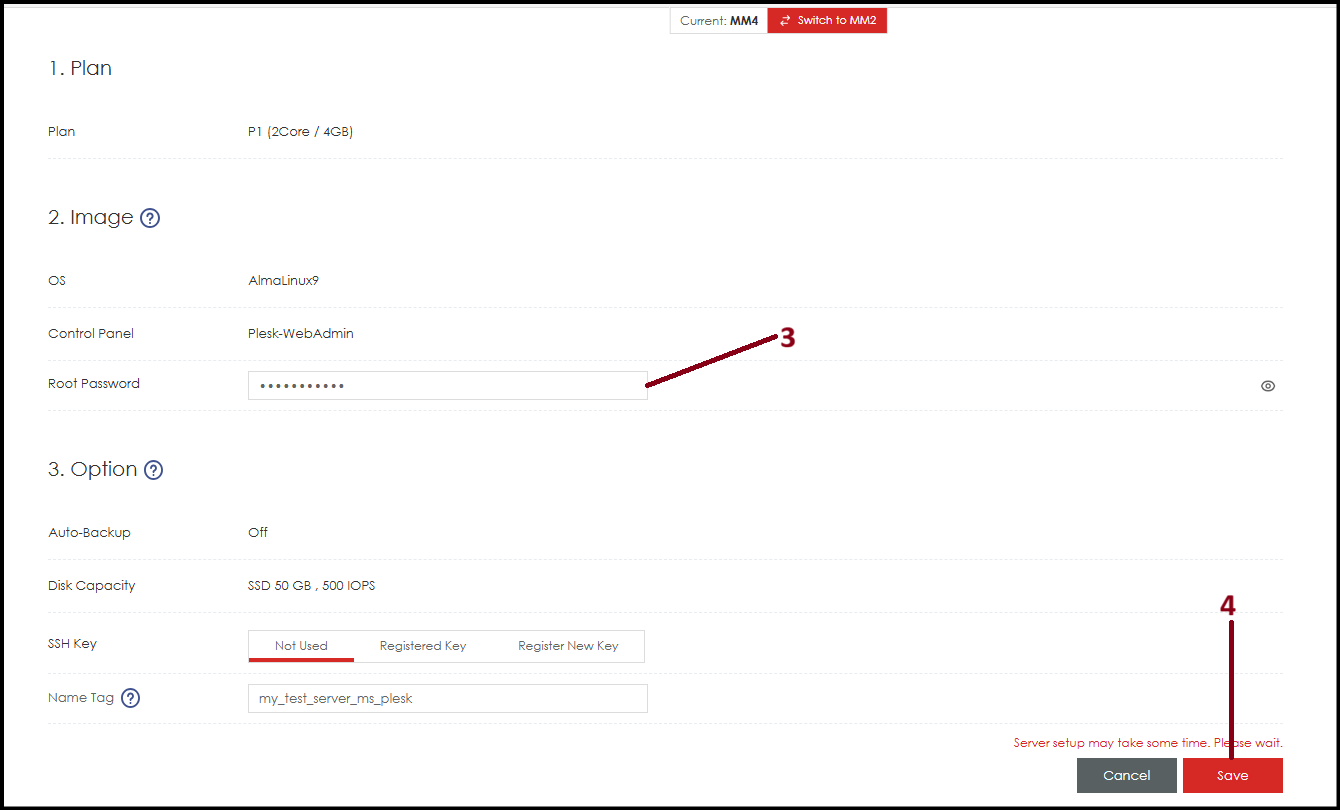
Step4. Now the server is installing OS and Plesk panel with your provided password showing server status as "CREATING". Please wait around 30 ~ 40 mins to complete. 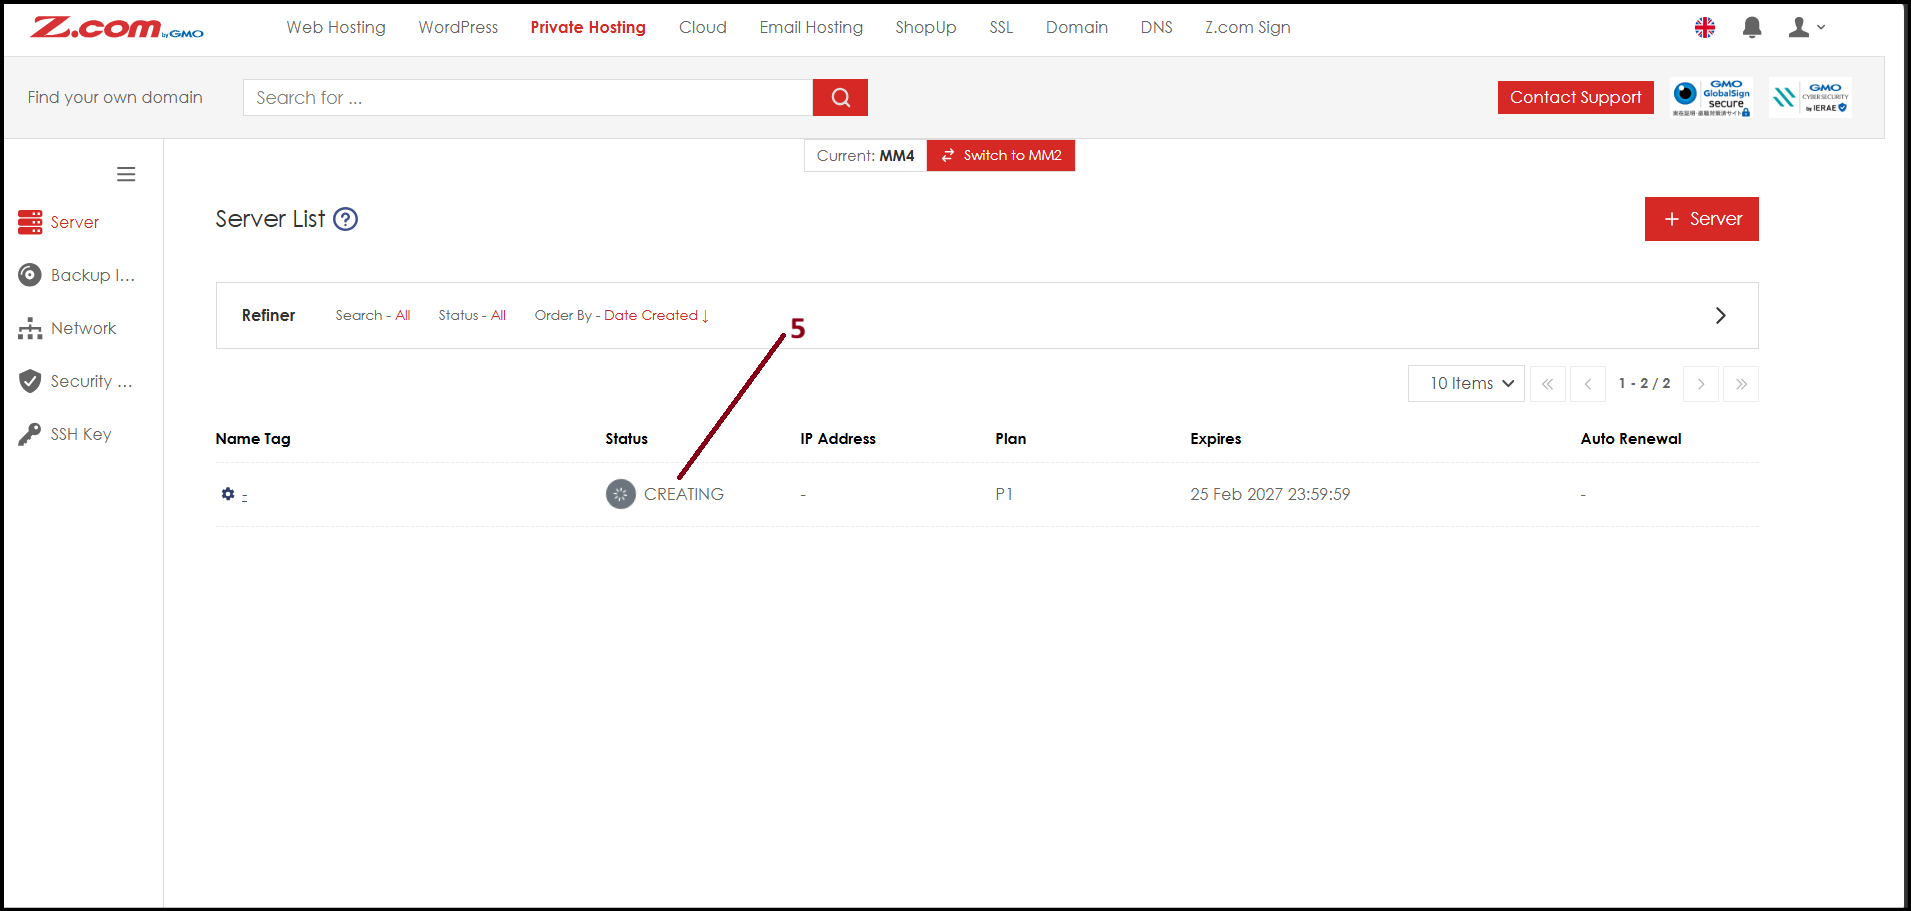
Step5. Now the server status is "Active". Please click the server below of NameTag. 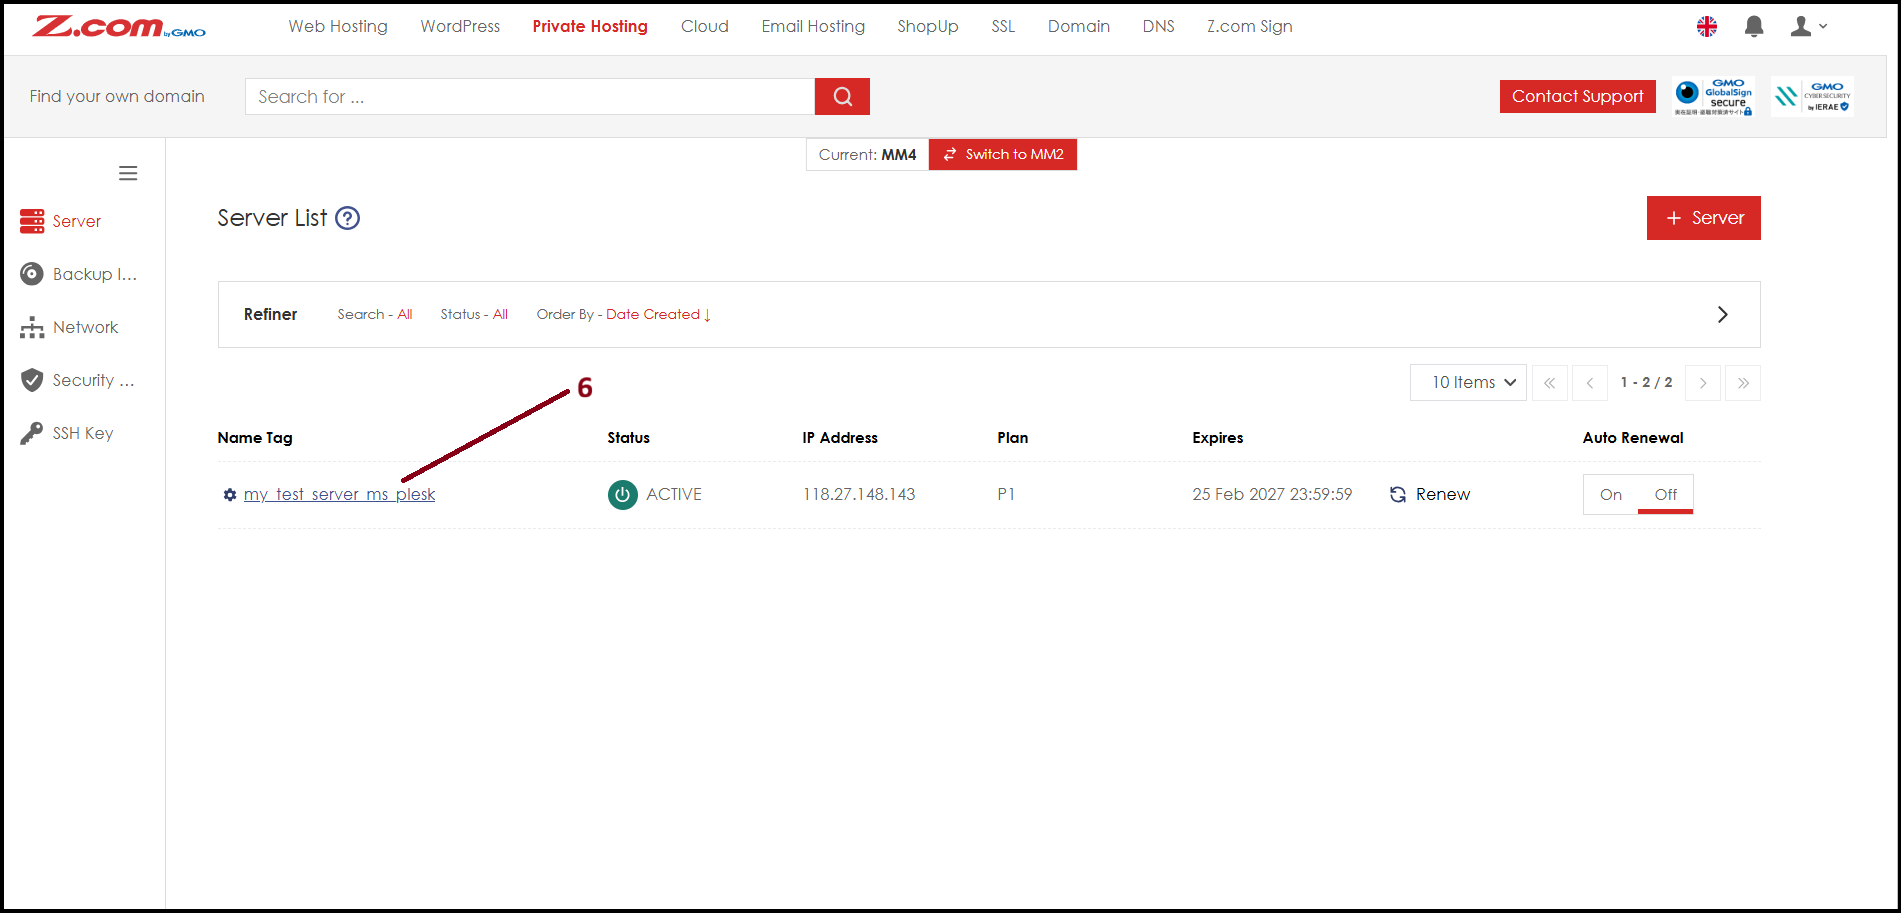
Step6. Here you will see server related informations. Please click "VM Information". 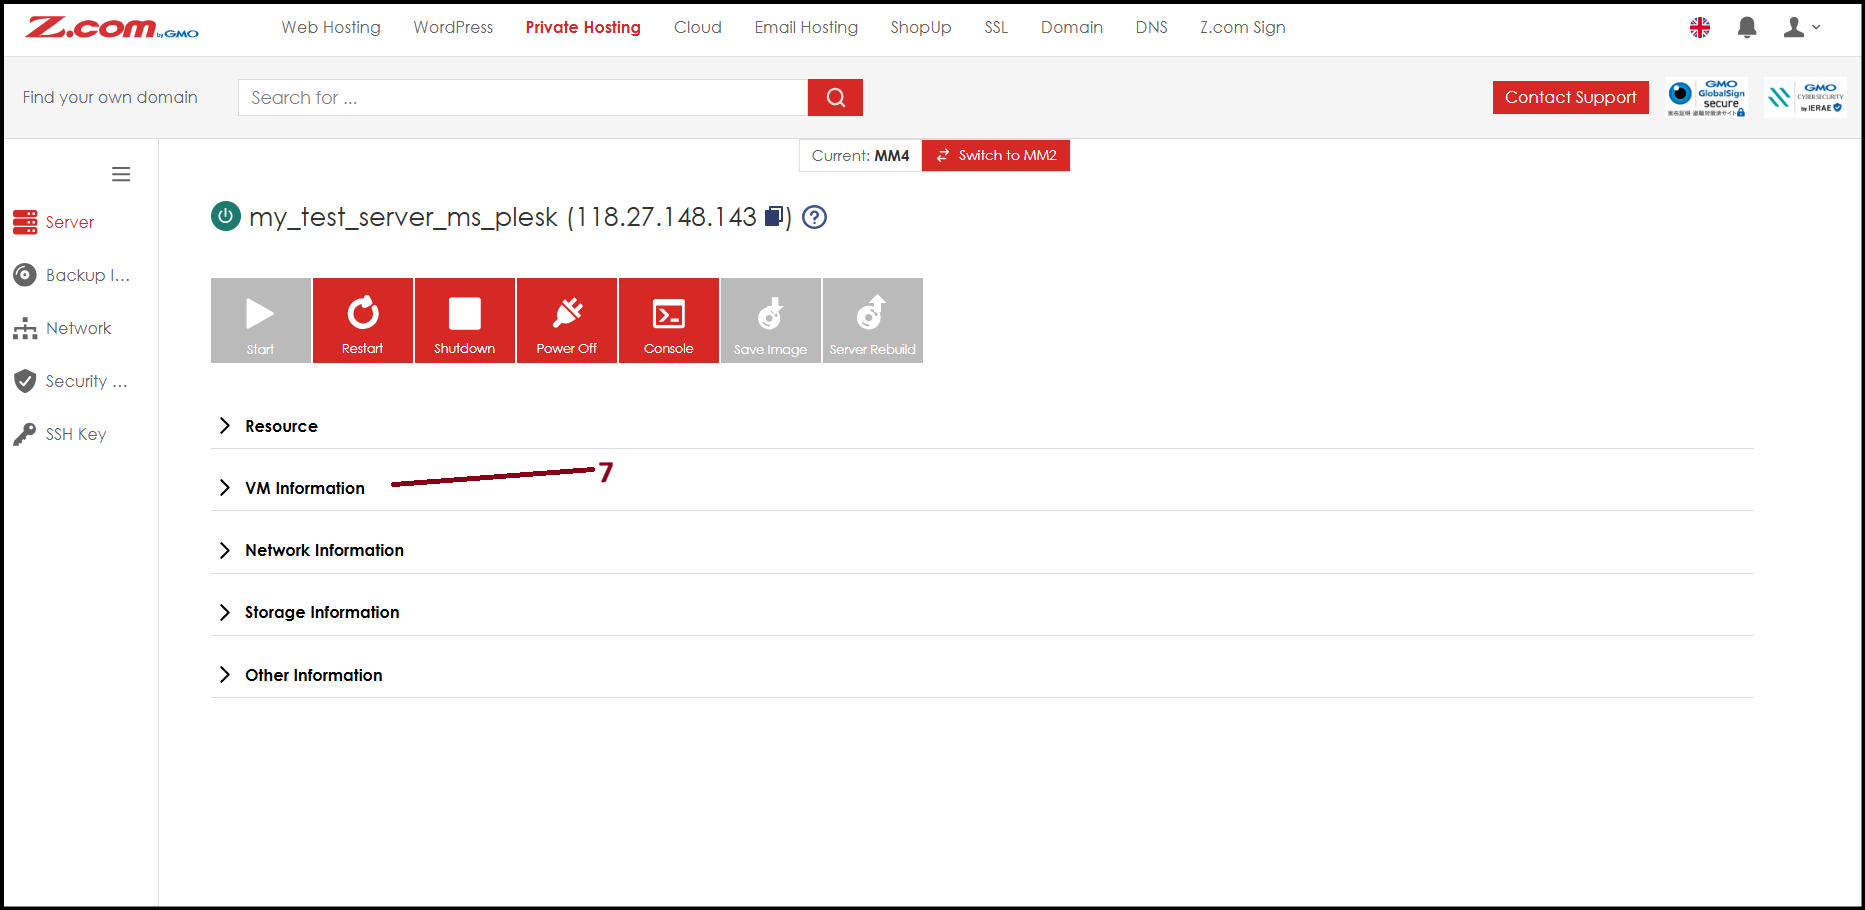
Step7. Copy "Login URL" address and open in a new tab to login to Plesk panel. 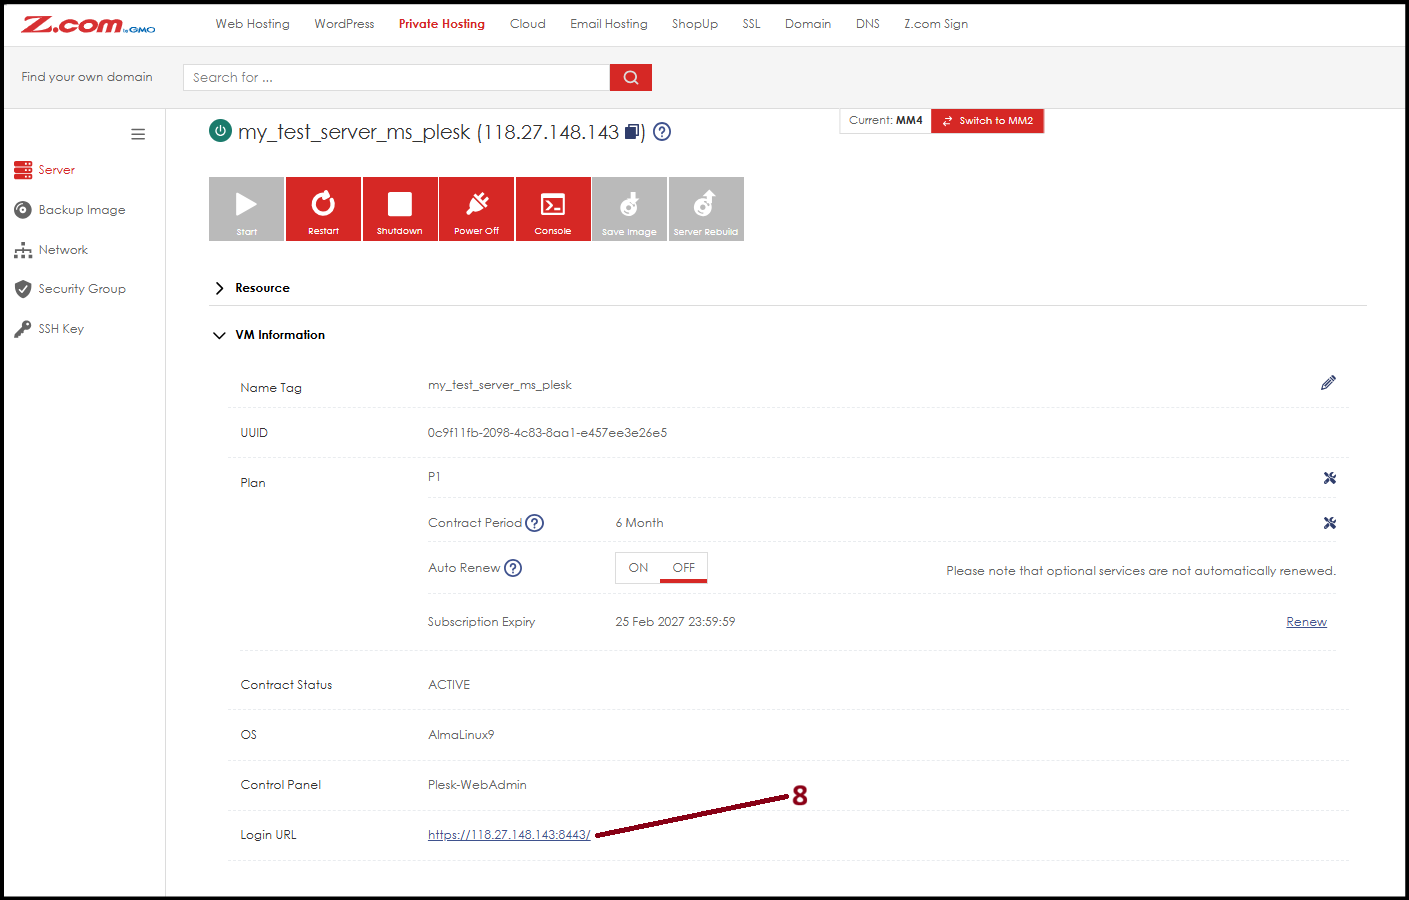
Step8. Since IP address can't have SSL, the browser may show Not Secure screen. Please click "Advance" and then click "Proceed to..". 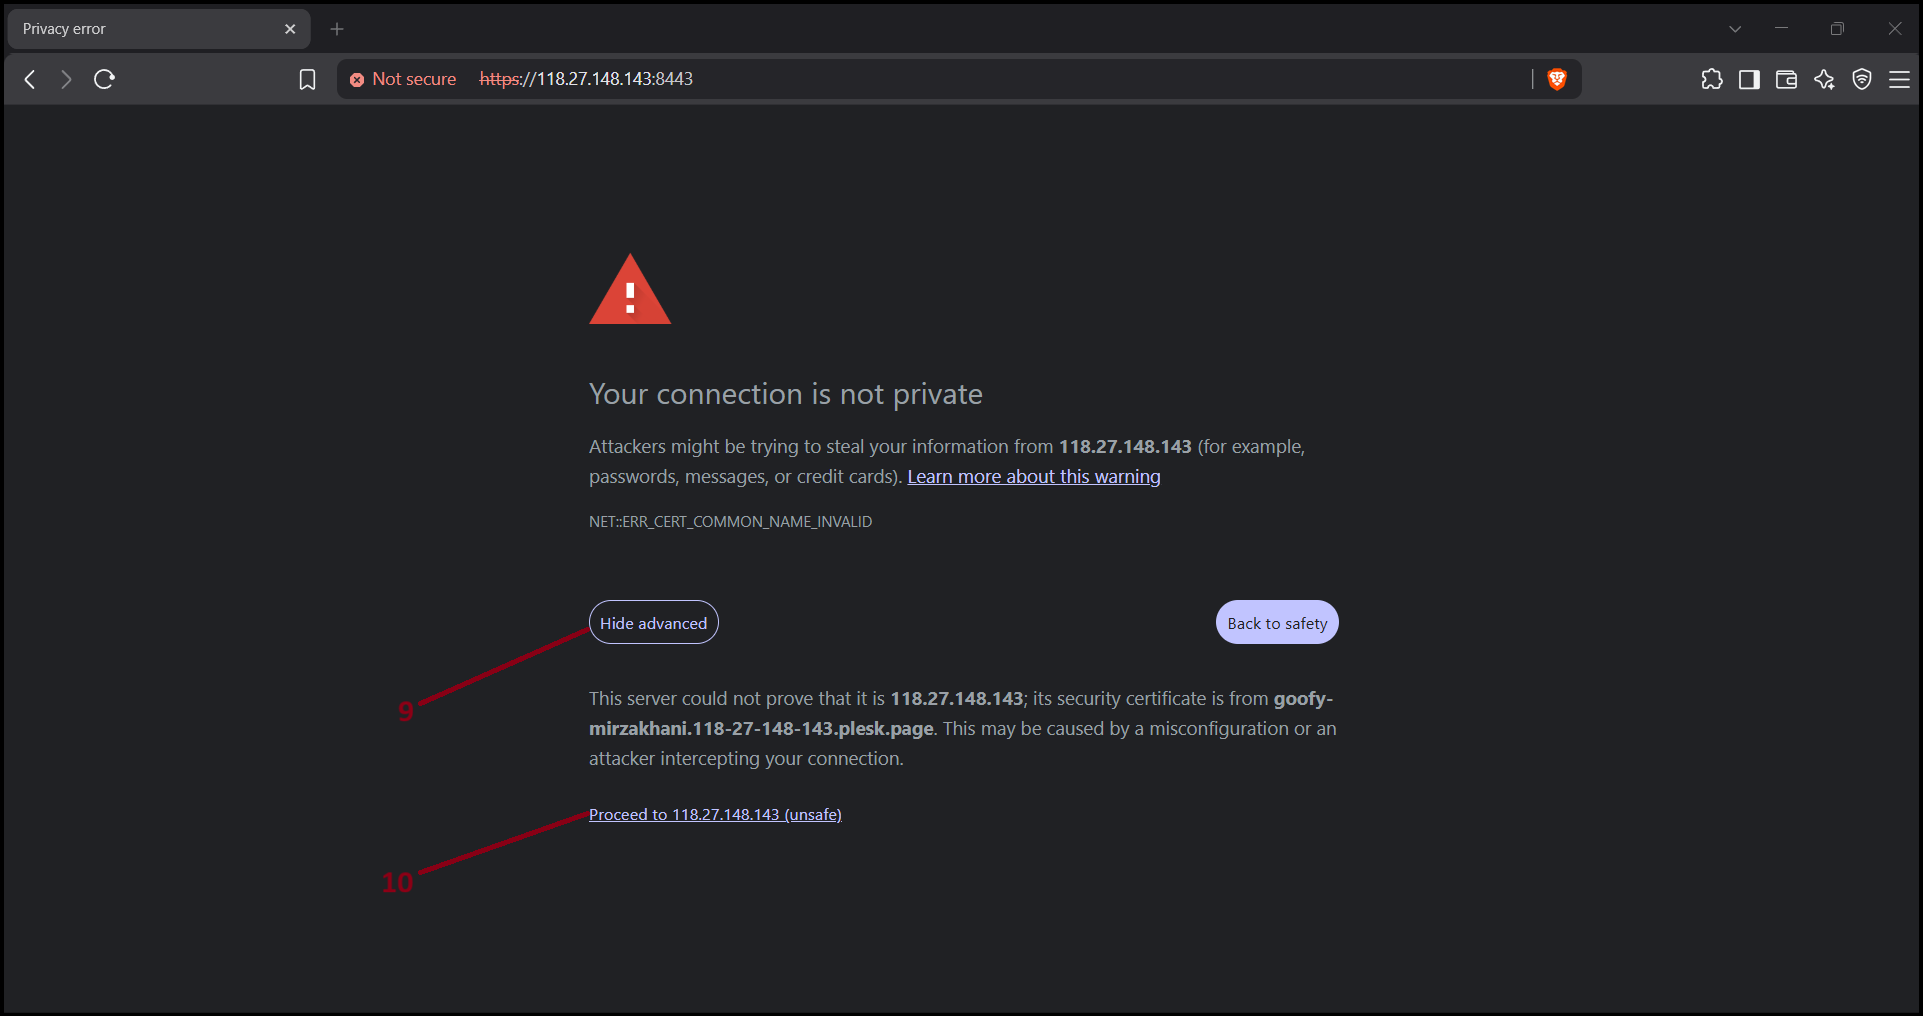
Step9. Now the Plesk panel login page will open. Please enter as below and click "Login".
Account - root
Password - [your server password]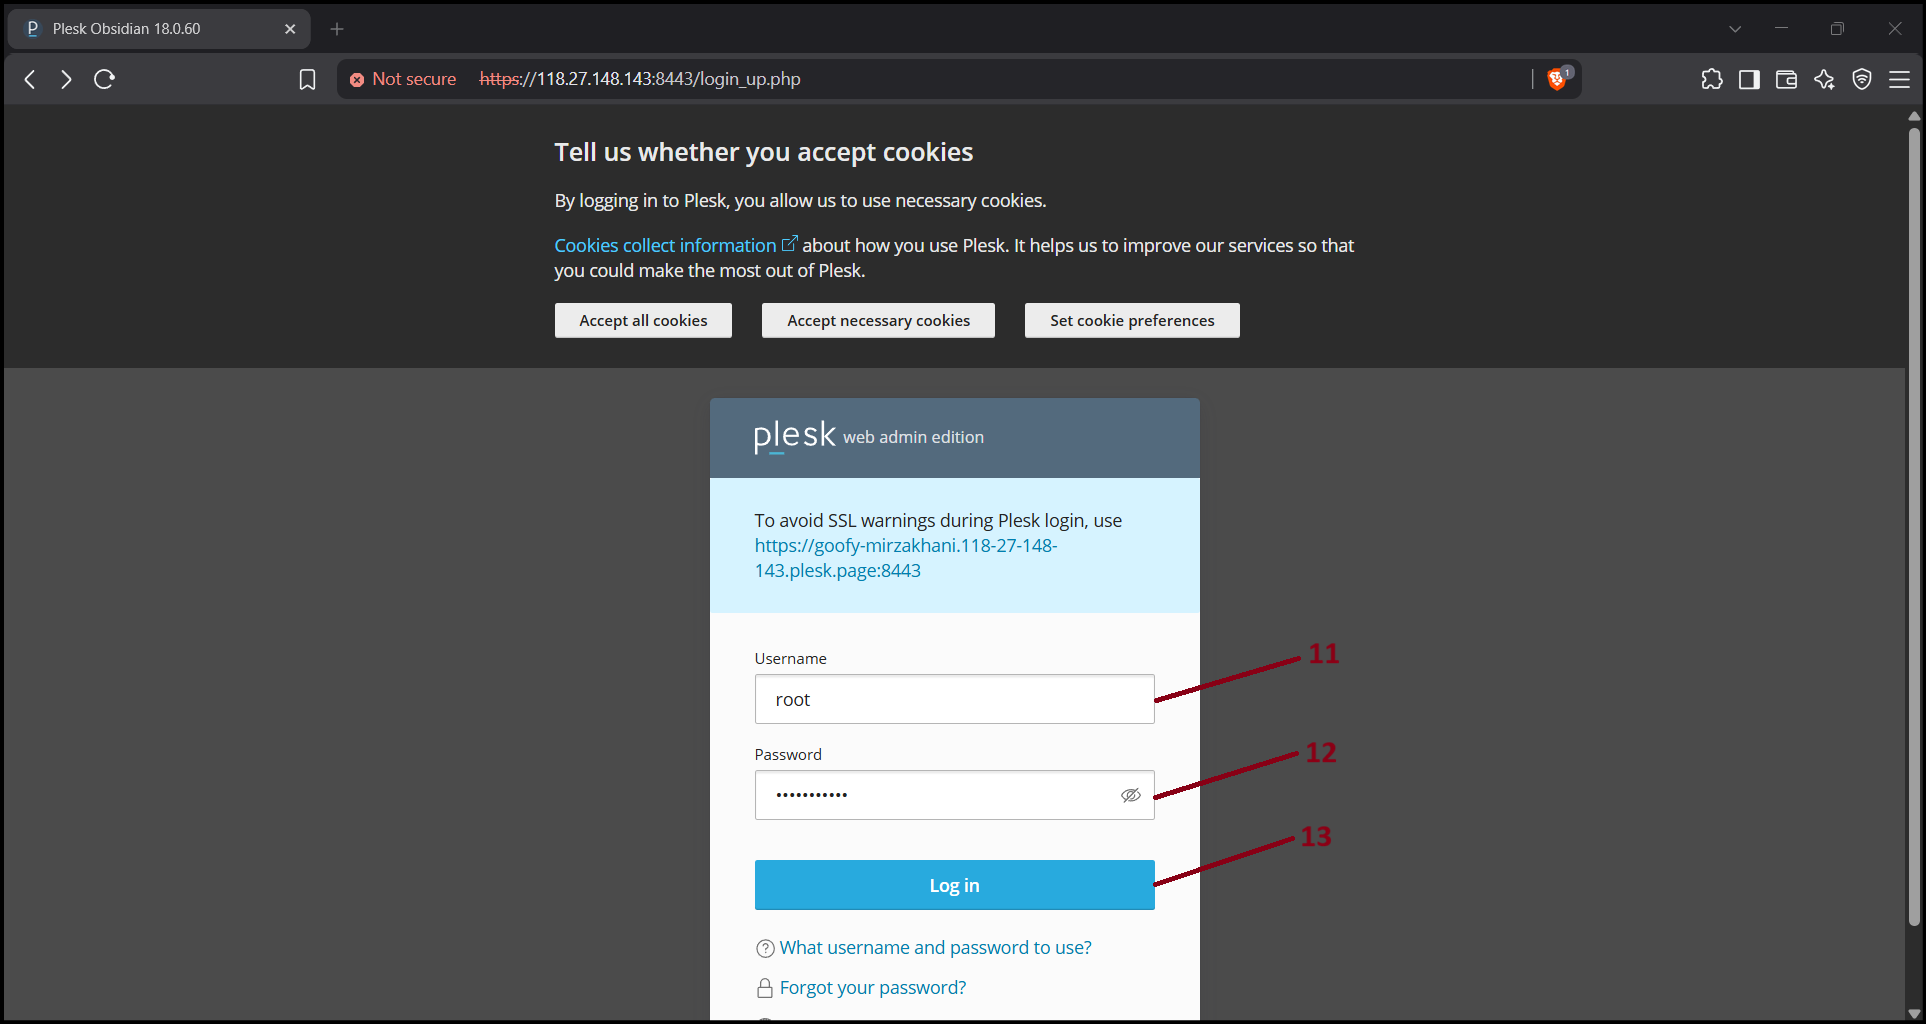
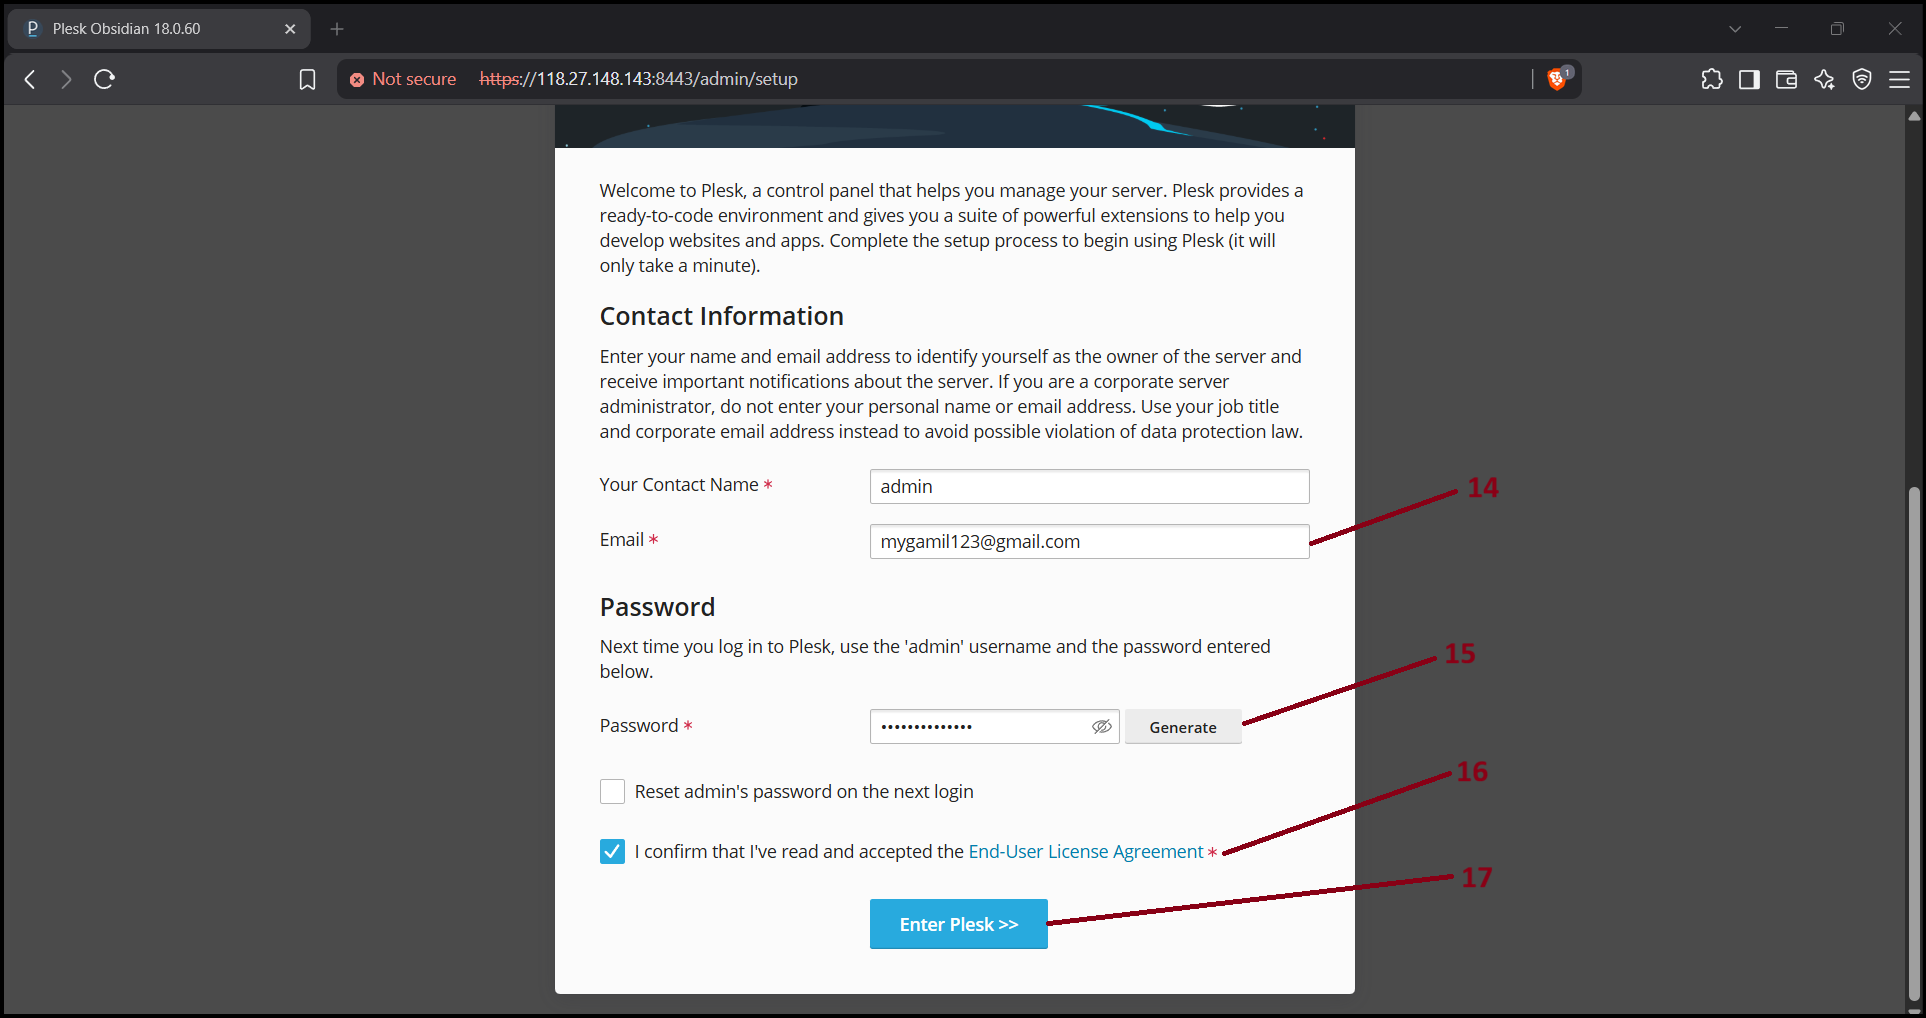
Step10. On next step, the Plesk panel will force you to add contact email address and new password for Plesk panel next time login. Enter contact email address, new password, tick mark license agreement and click "Enter Plesk". Also note that the username will be change from root to "admin". New Login details will look like below.
Account - admin
Password - [new password of Plesk panel]
Step11. The Plesk panel will open and you can start adding domain in "Website & Domain > Add Domain" to deploy your website projects. 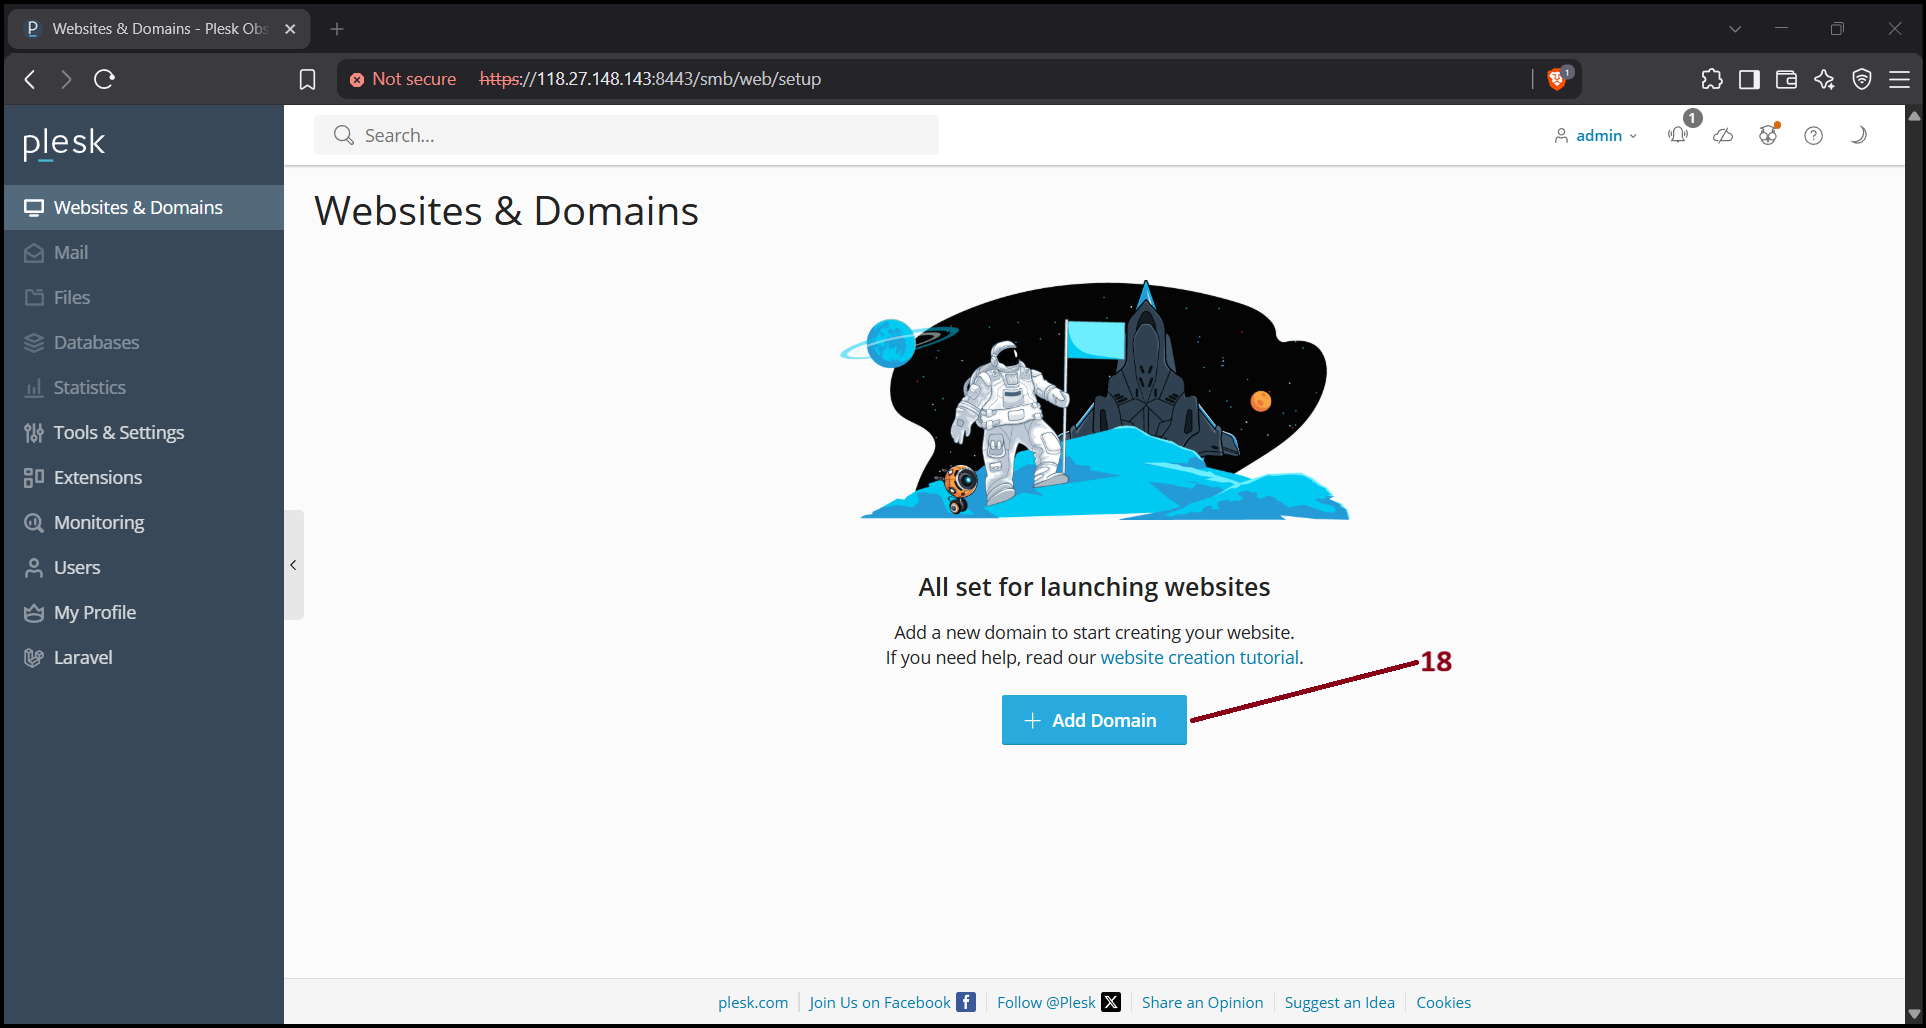
Thank You!
Was this article helpful?
That’s Great!
Thank you for your feedback
Sorry! We couldn't be helpful
Thank you for your feedback
Feedback sent
We appreciate your effort and will try to fix the article