How to Import a Database into CloudPanel MM4?
Step1. Login to z.com account, https://hosting.z.com/mm/signin/ 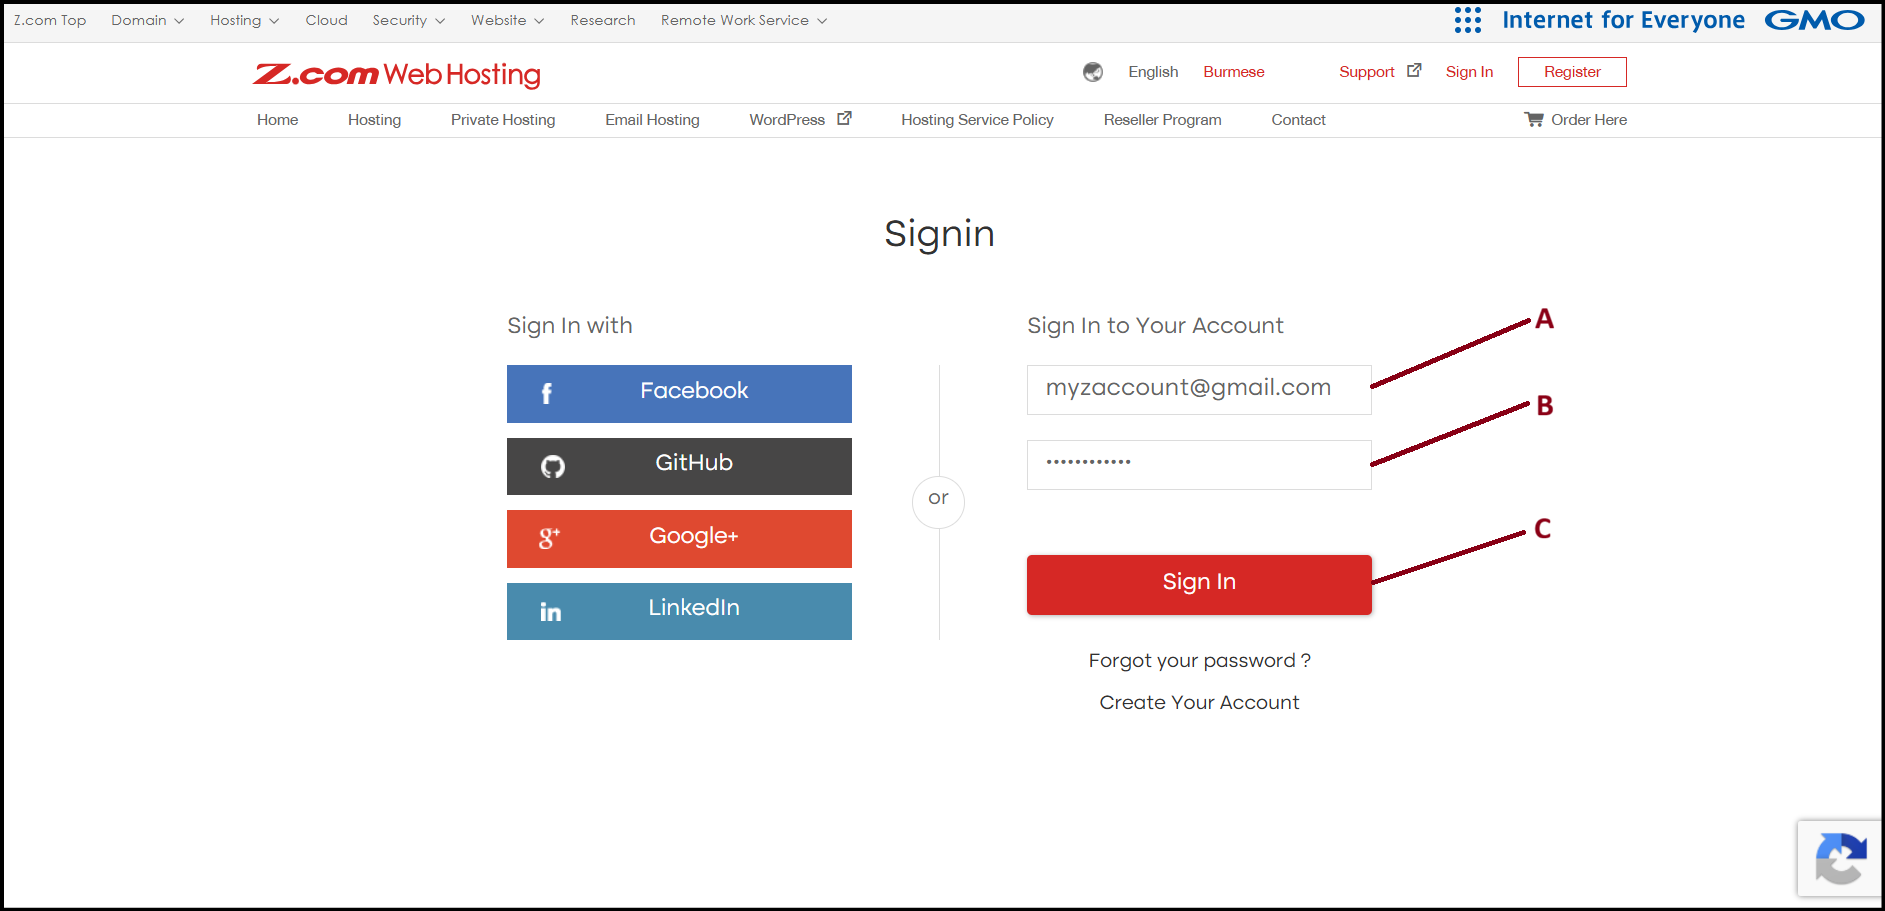
Step2. Go to the "Private Hosting" tab under MM4. And click the server under Name Tag. 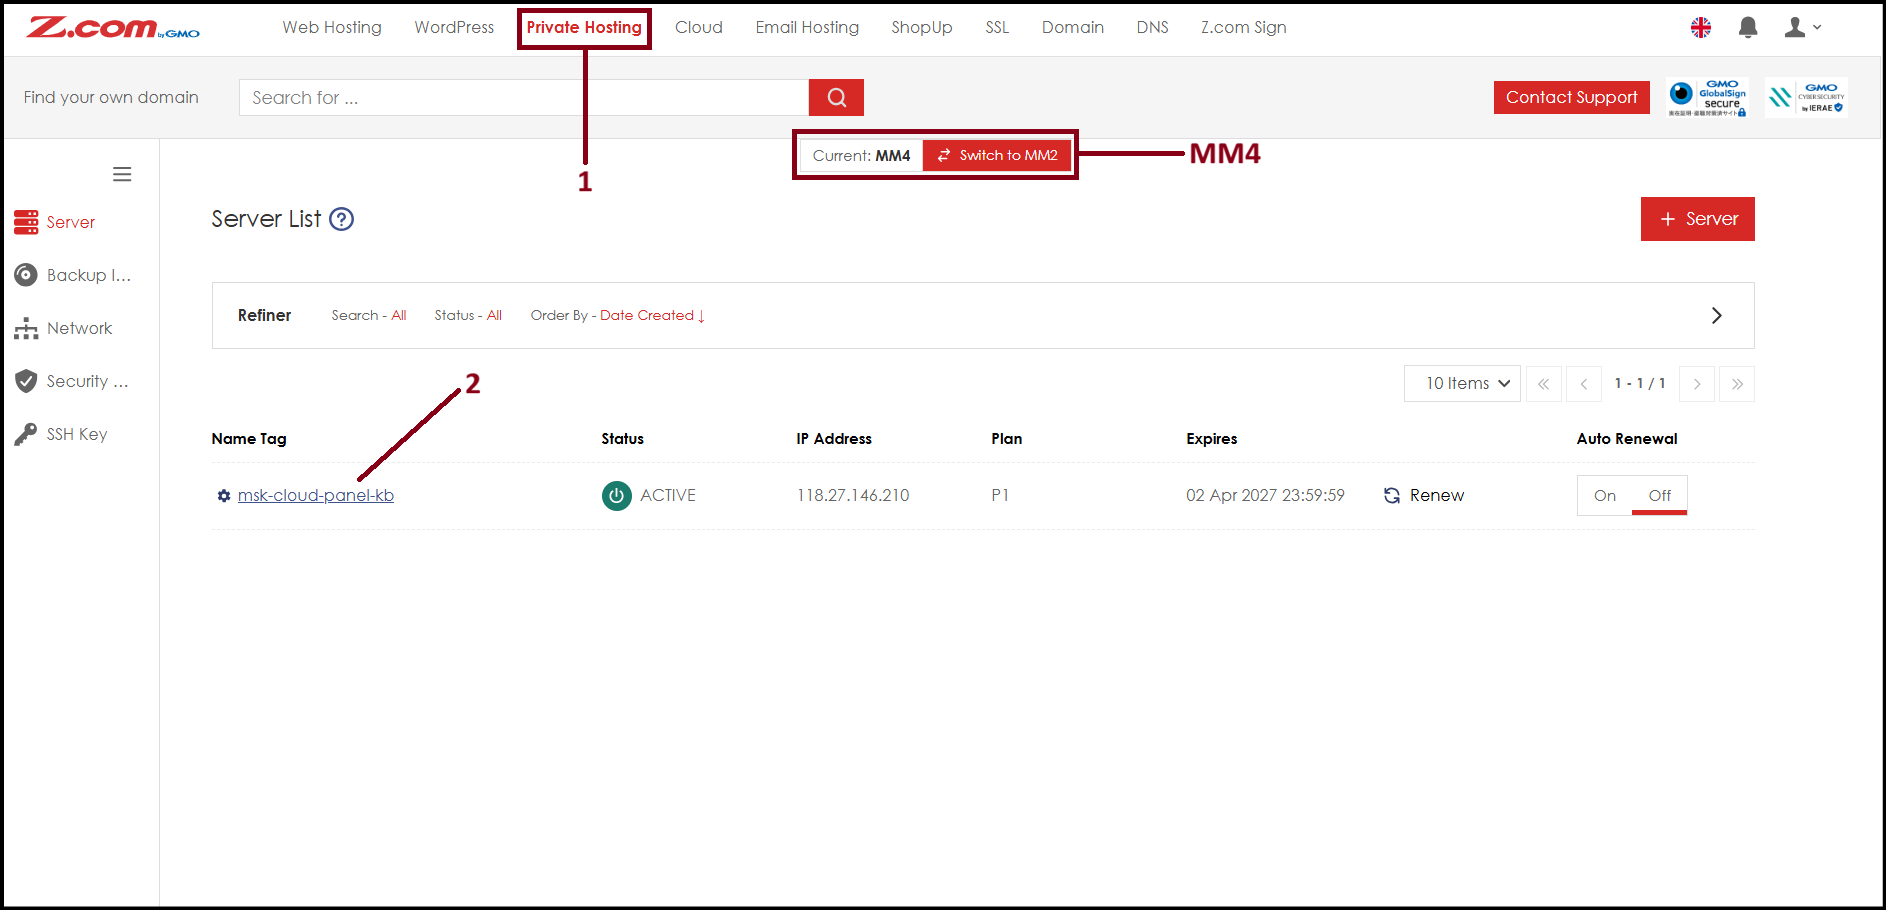
Step3. Click "VM Information" to check Cloud Panel login URL.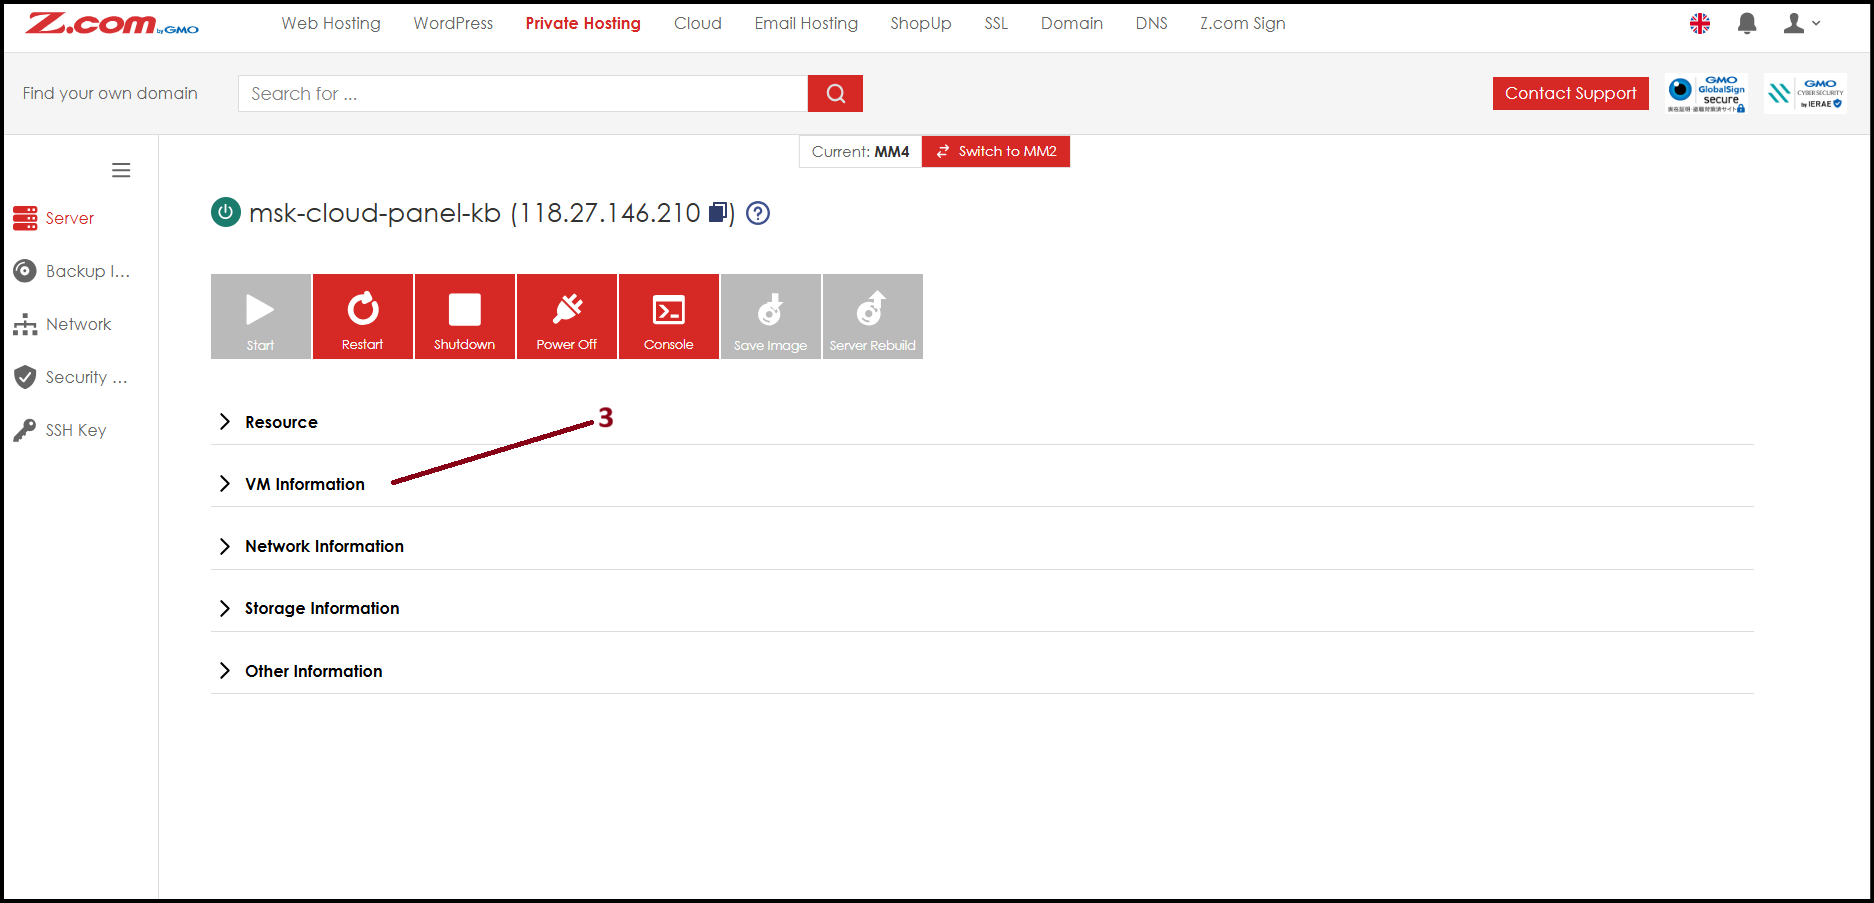
Step4. Click the Login URL link to open the Cloud Panel login page.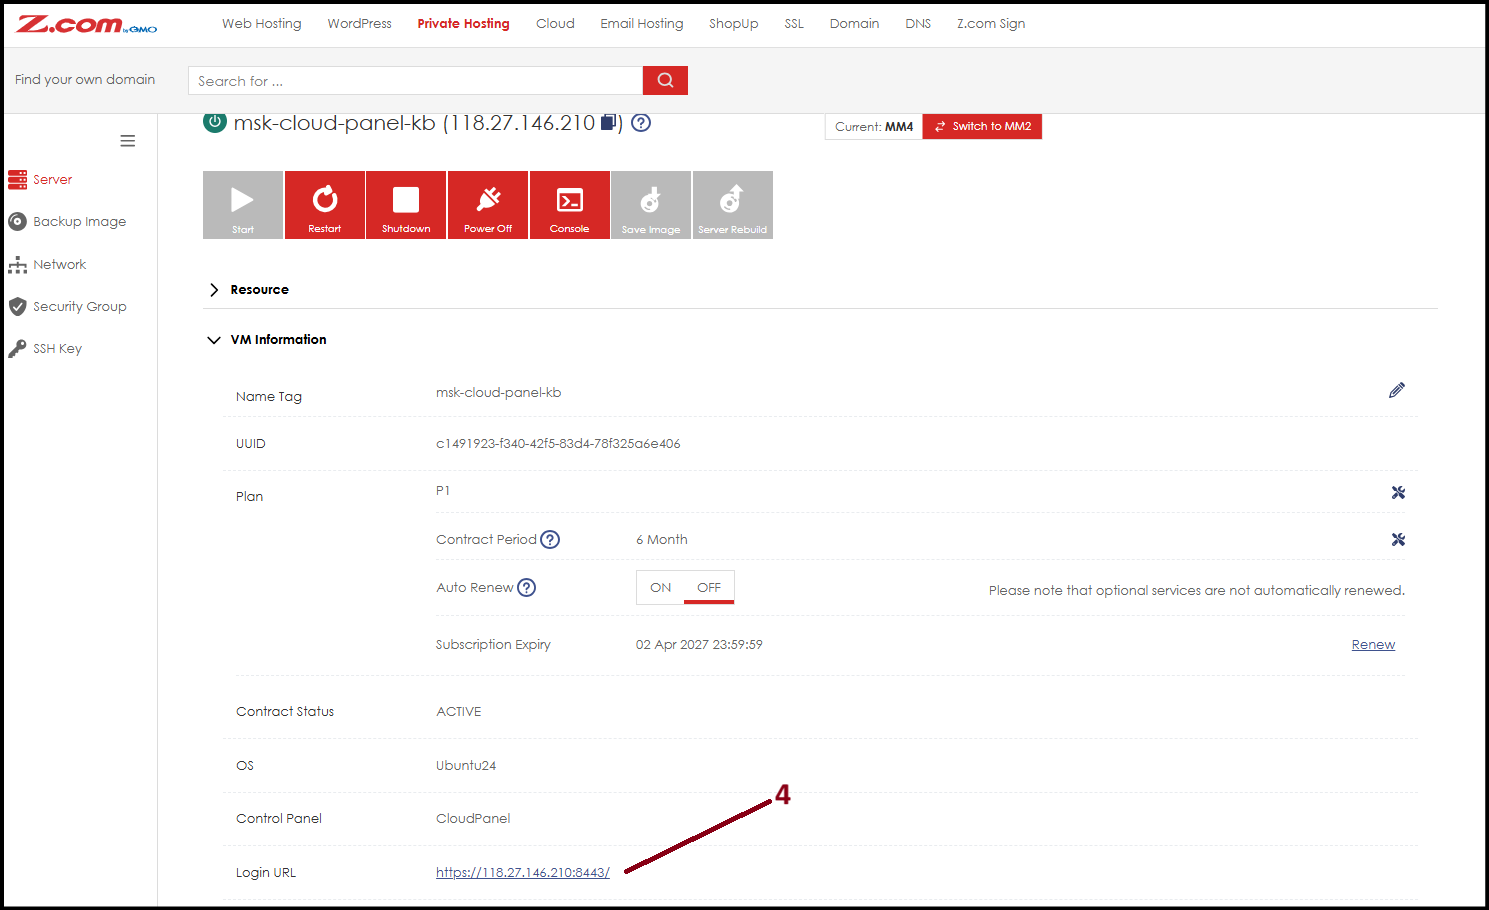
Step5. Login with Cloud Panel Username and Password.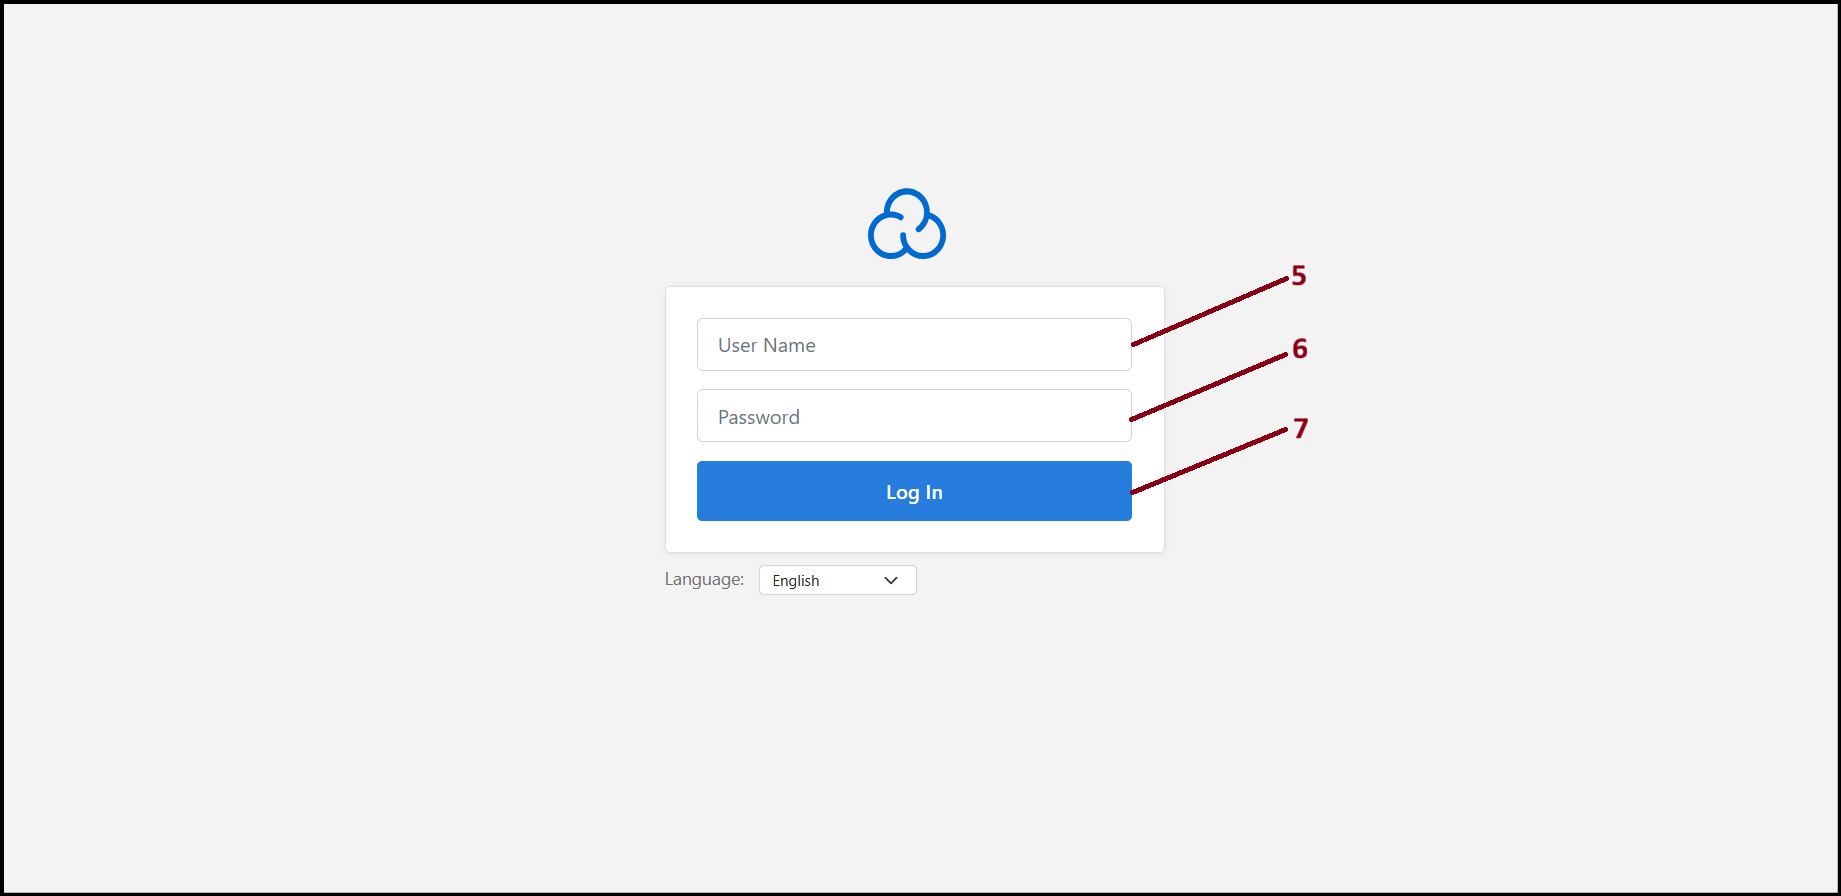
Step6. Under "Sites" menu, click "Manage" beside of domain name. 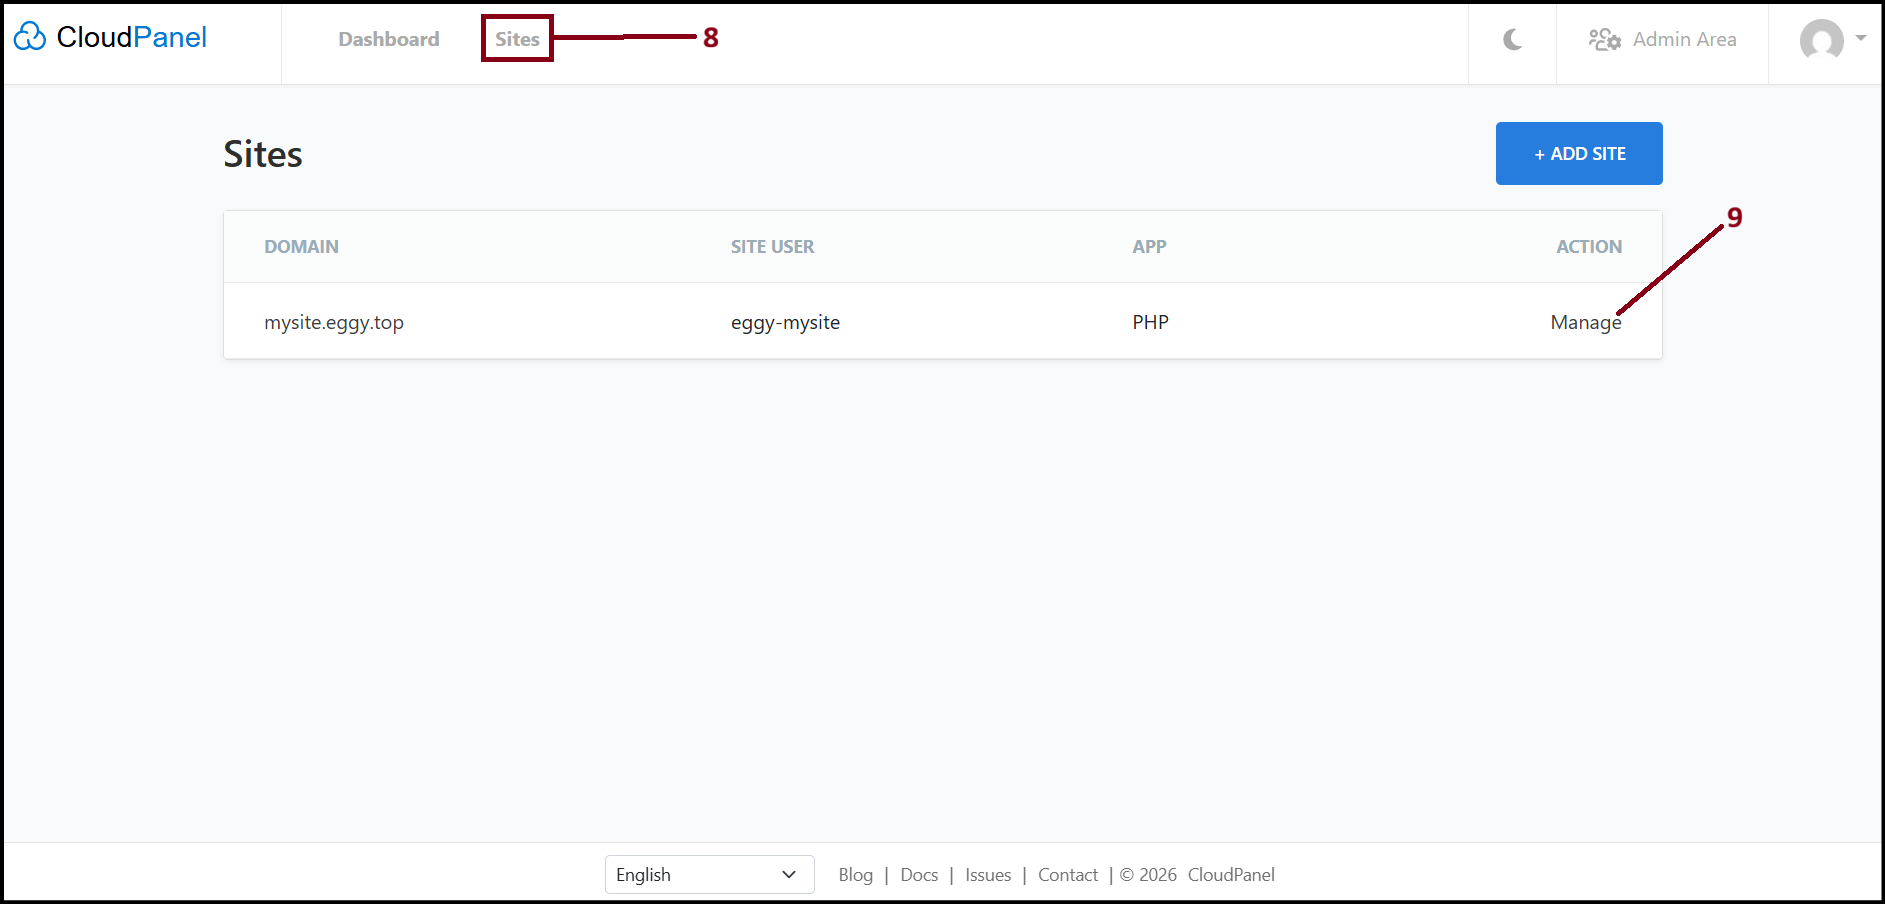
Step7. Choose "Databases" menu, note down the database name where you wish to import. 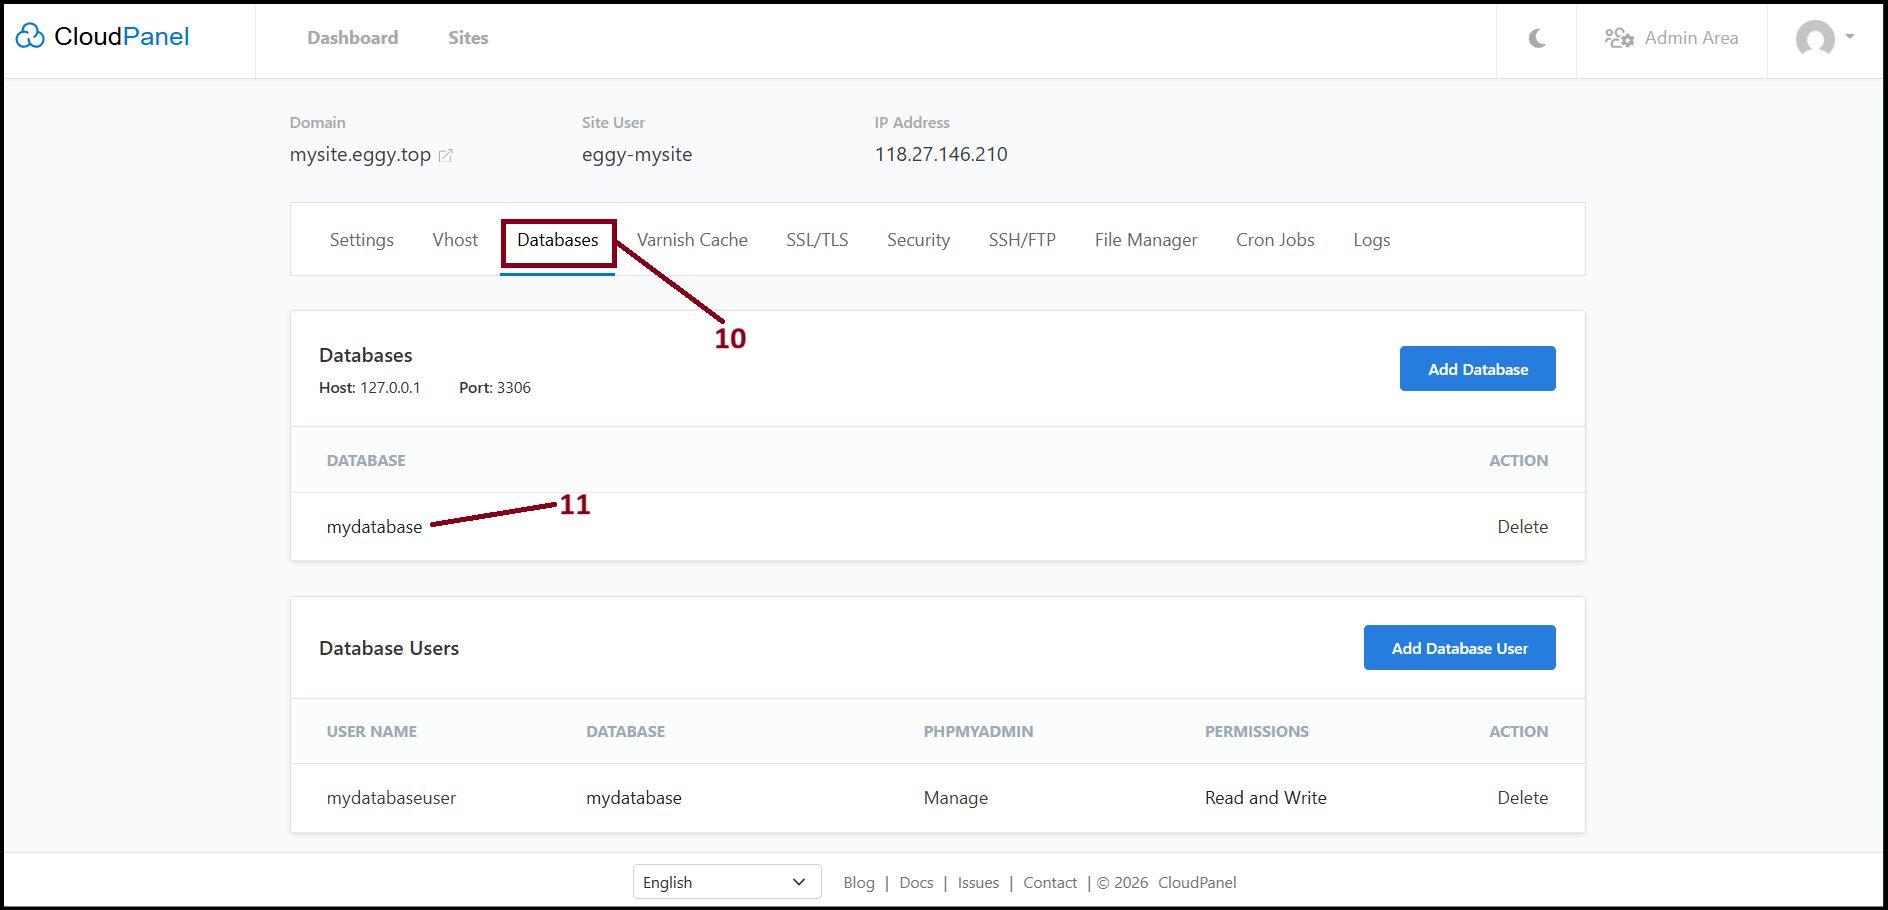
Step8. Now choose "Settings" menu, note down the server IP Address, Site User and set password and click "Save". The Site User and password will be use to SSH login. 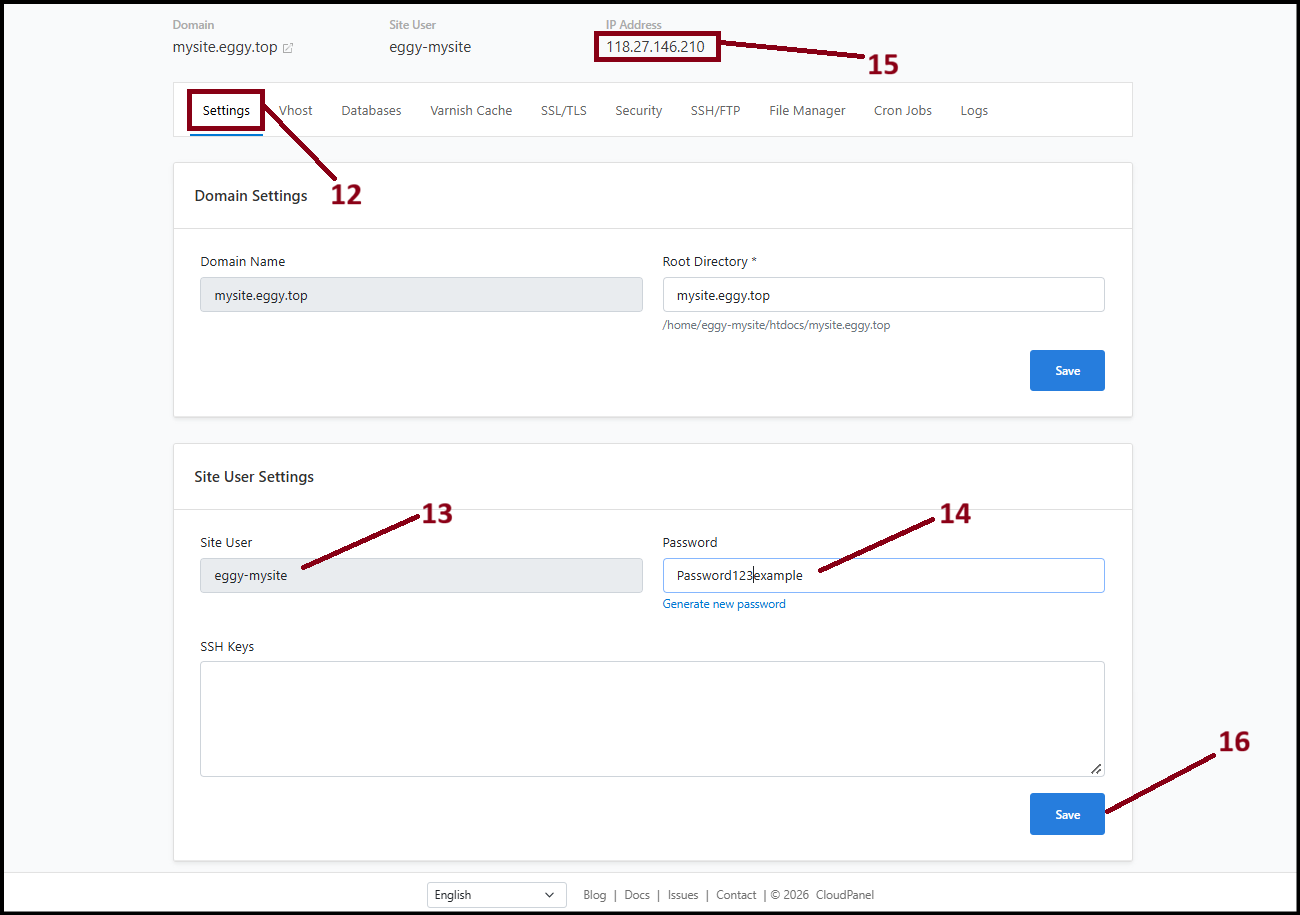
Step9. Choose "File Manager", and upload the database file under "tmp" folder with "Add New" button. 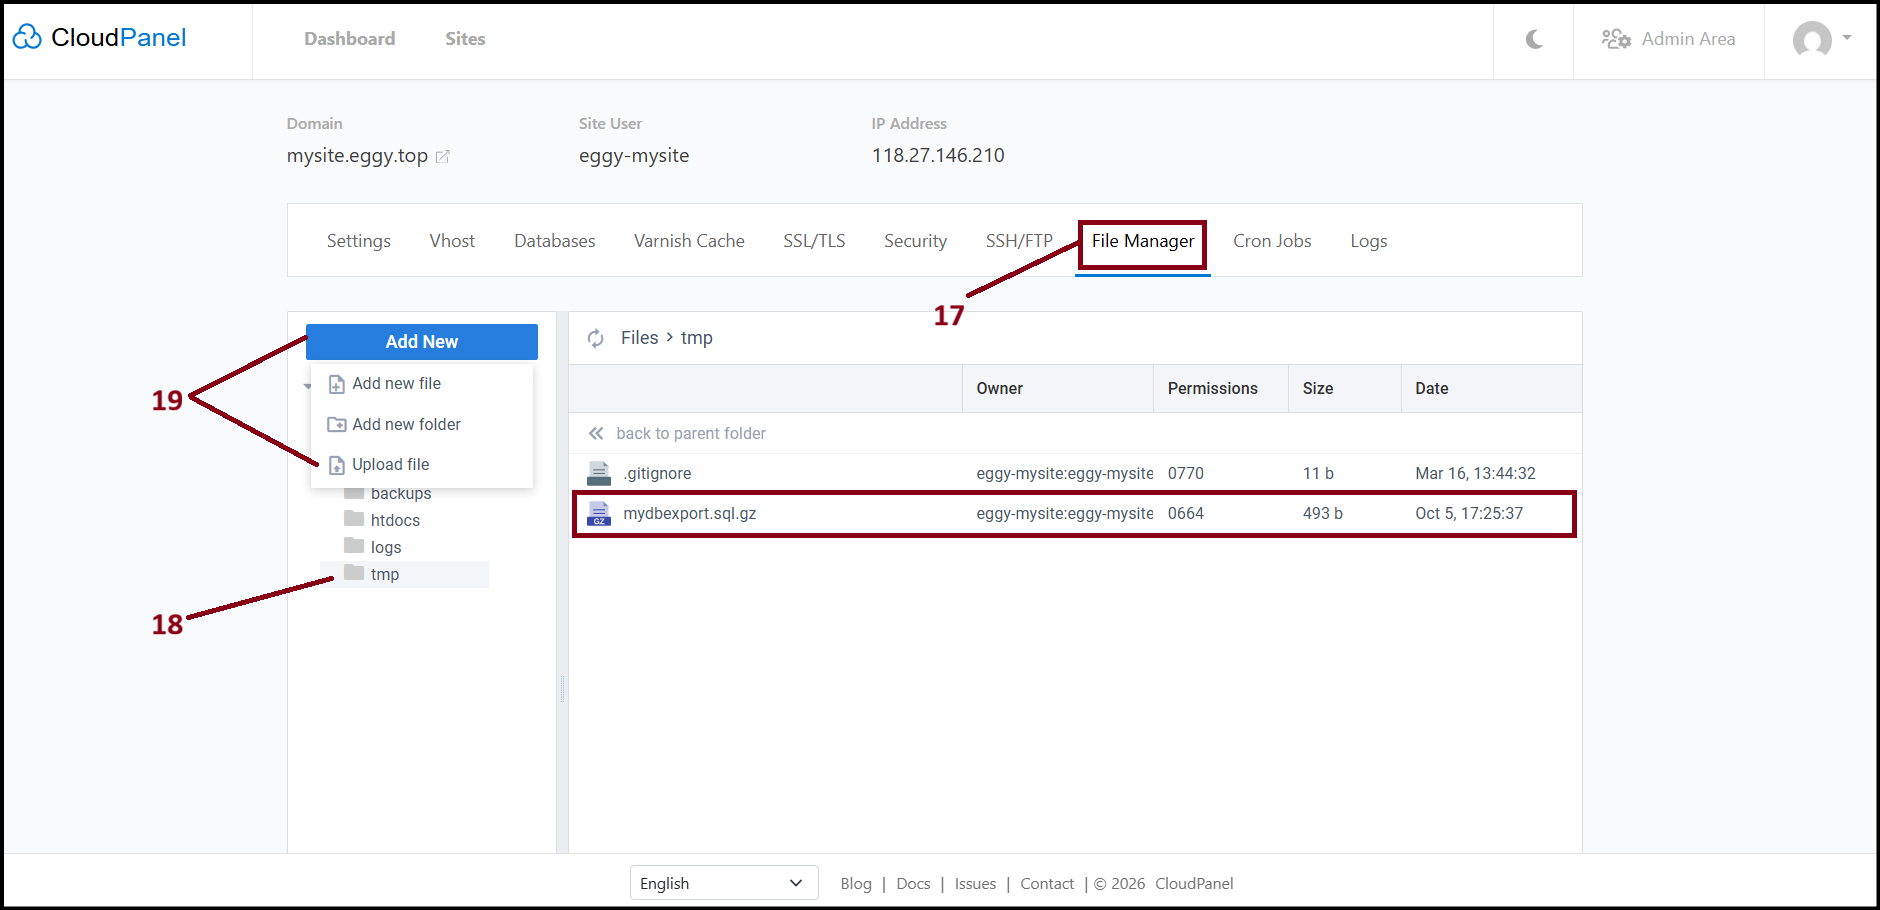
Step10. Open Command Prompt and type below command to login via SSH. Replace the server information with your actual server.
cmd - ssh [sitename]@[server IP]
example cmd - ssh eggy-mysite@118.27.146.210
After login, type below command to go to database path and import.
cmd - cd ~/tmp/
cmd - clpctl
cmd - clpctl db:import --databaseName=[database name] --file=[exported name].sql.gz
example cmd - clpctl db:import --databaseName=mydatabase --file=mydbexport.sql.gz
After that, the database will be successfully imported.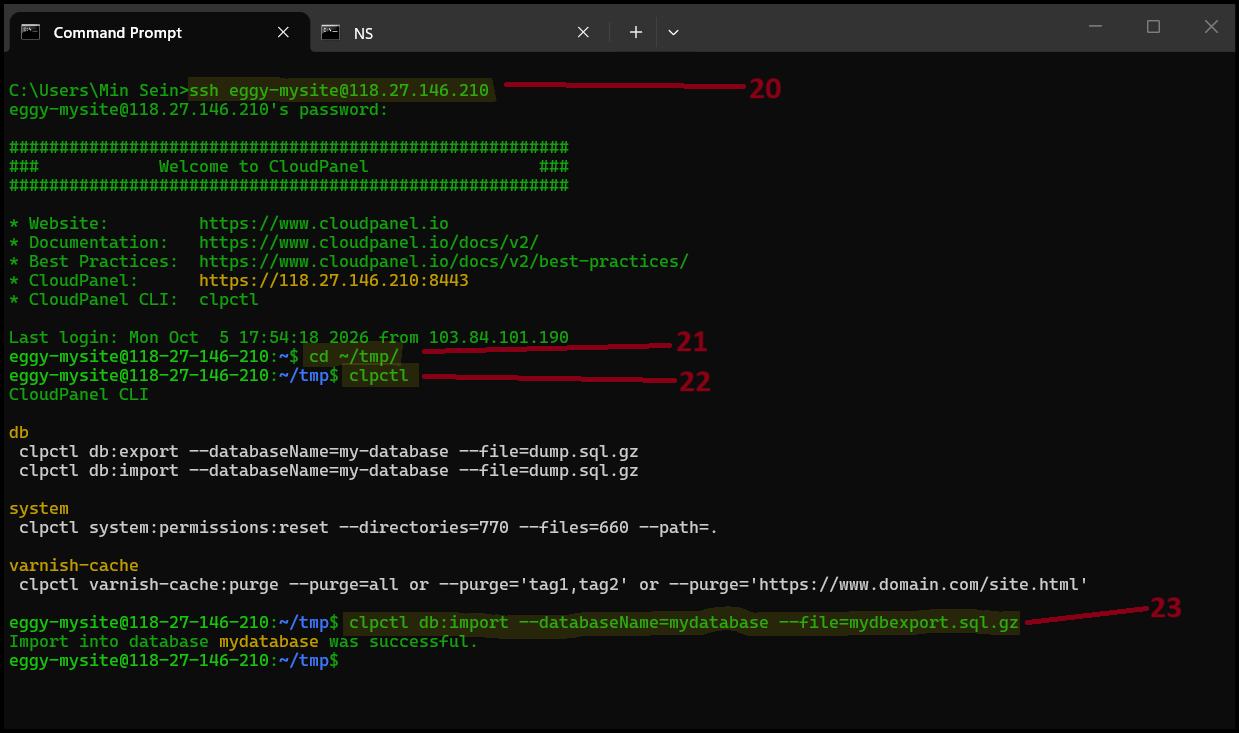
Was this article helpful?
That’s Great!
Thank you for your feedback
Sorry! We couldn't be helpful
Thank you for your feedback
Feedback sent
We appreciate your effort and will try to fix the article