How to Assign Private Network in Private Hosting MM4?
Step1. Login to z.com account, https://hosting.z.com/mm/signin/ 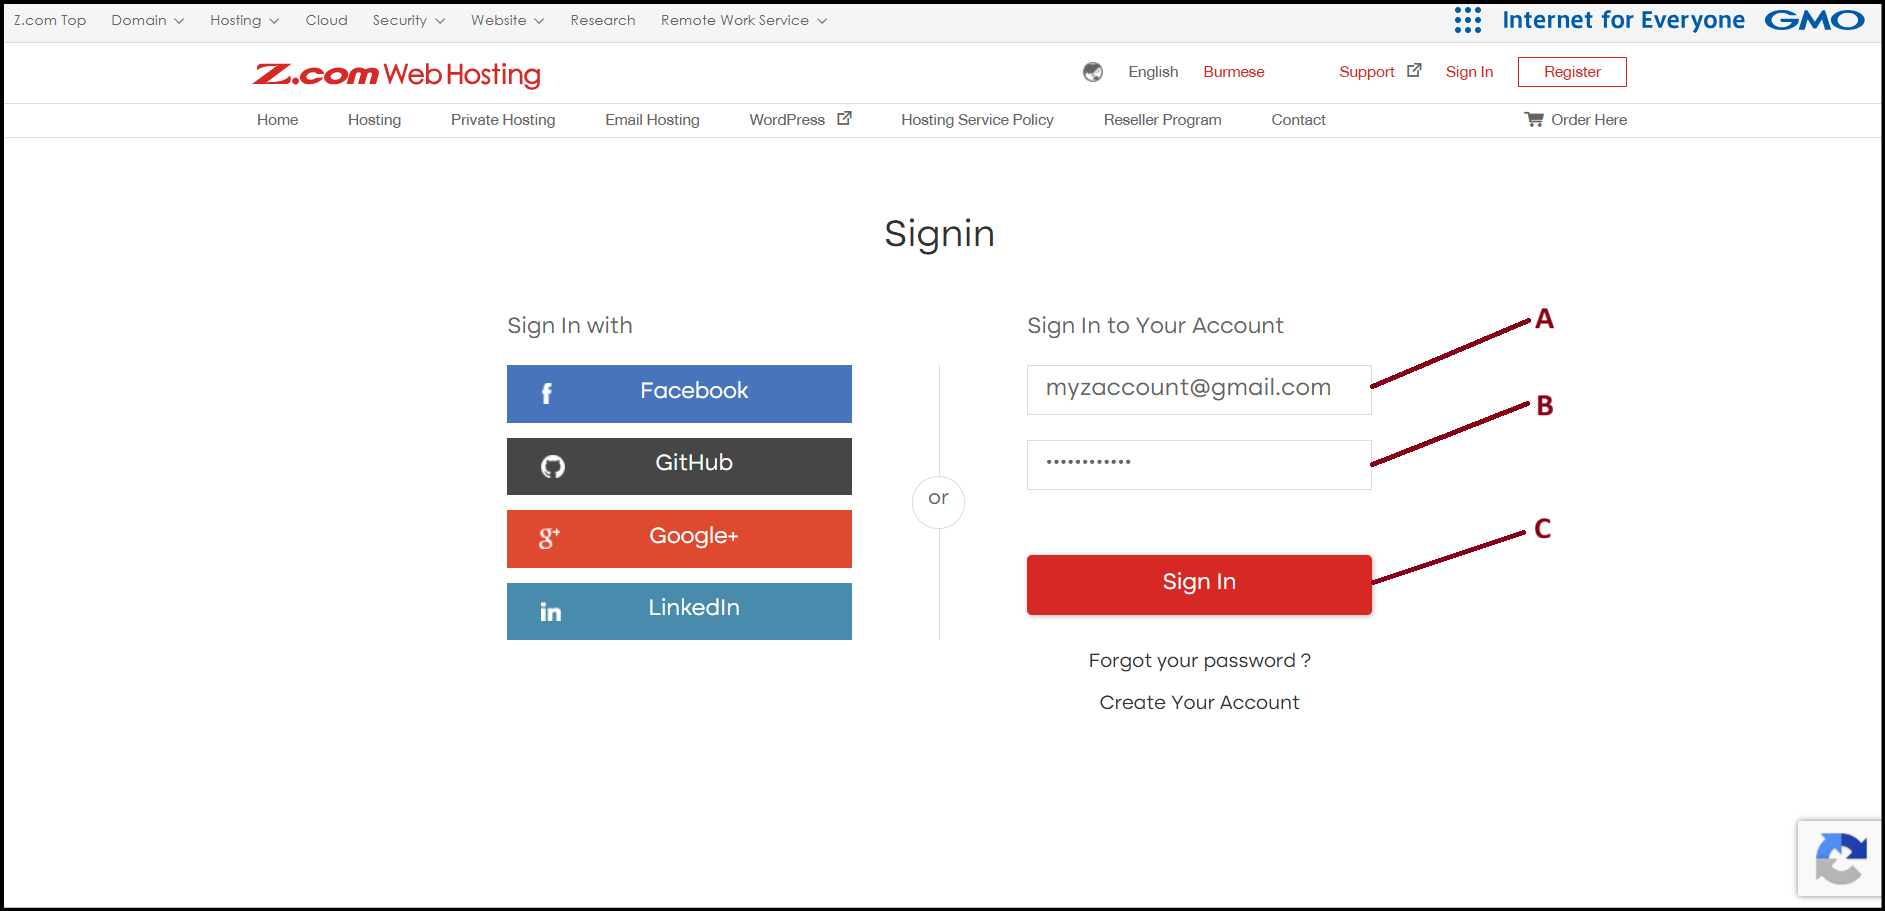
Step2. Go to the "Private Hosting" tab under MM4. And click "Network" from left side menu. 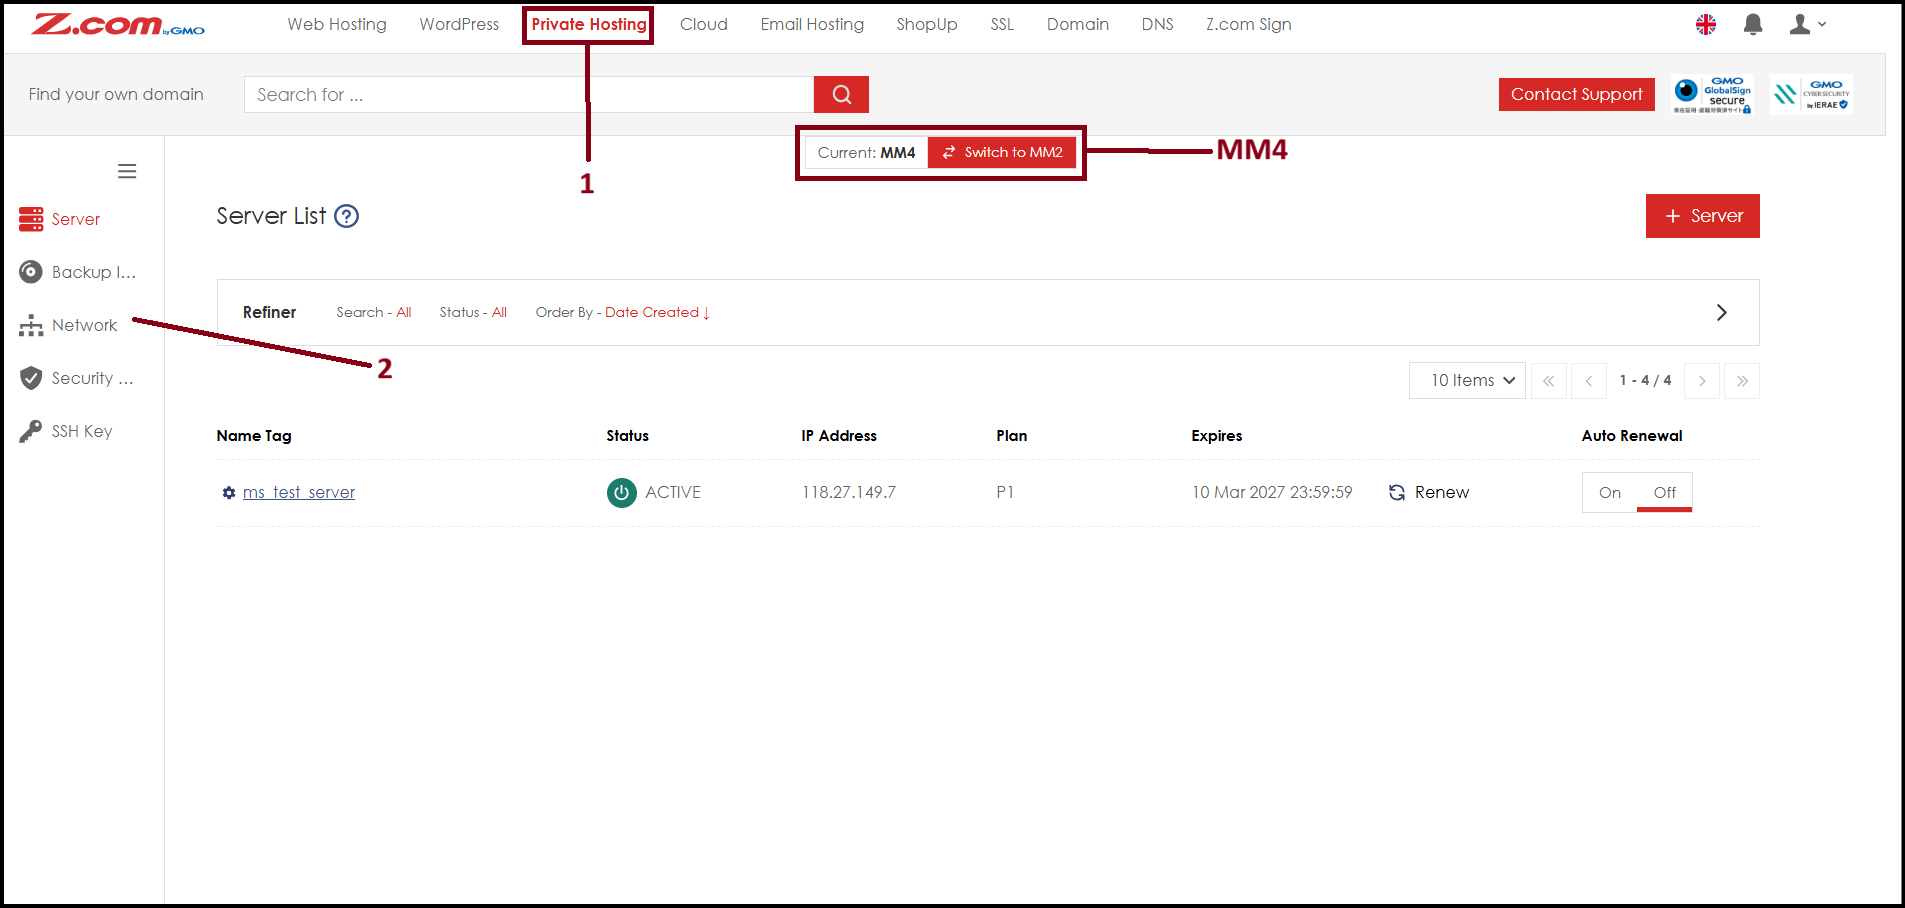
Step3. Click "+Network" to order. 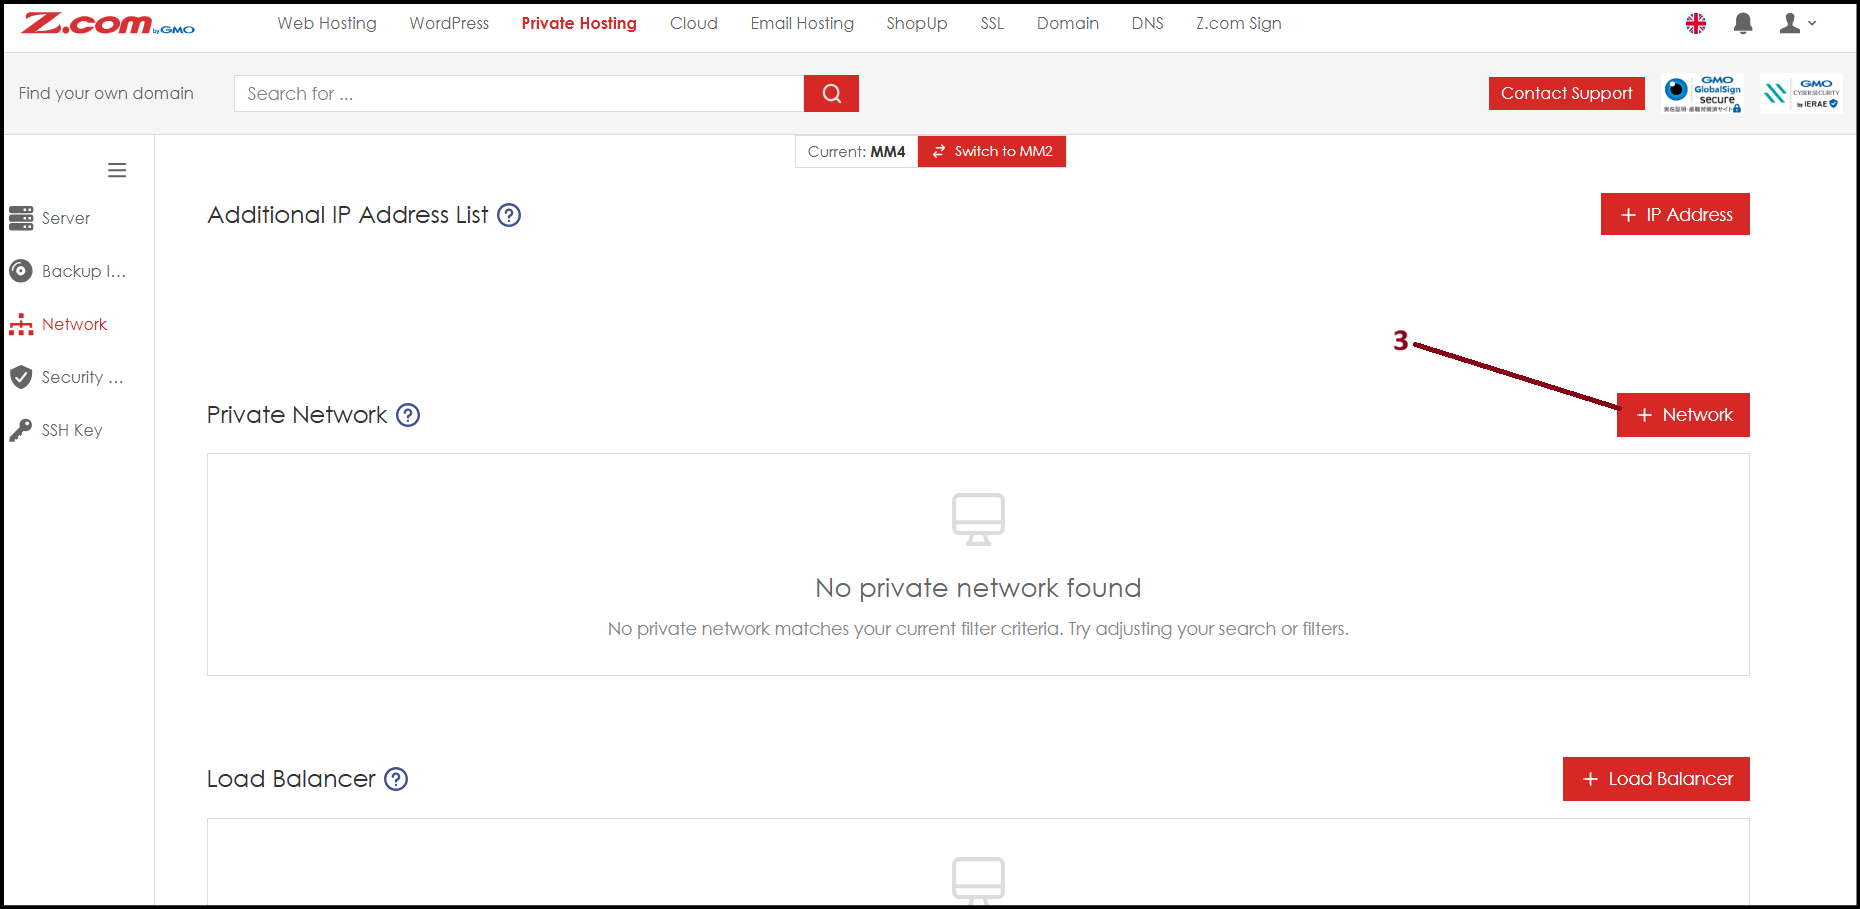
Step4. At this step, fill "Name Tag", choose "Addresses Class" and enter desire ip range and subnet. After that, click "Add" to create. 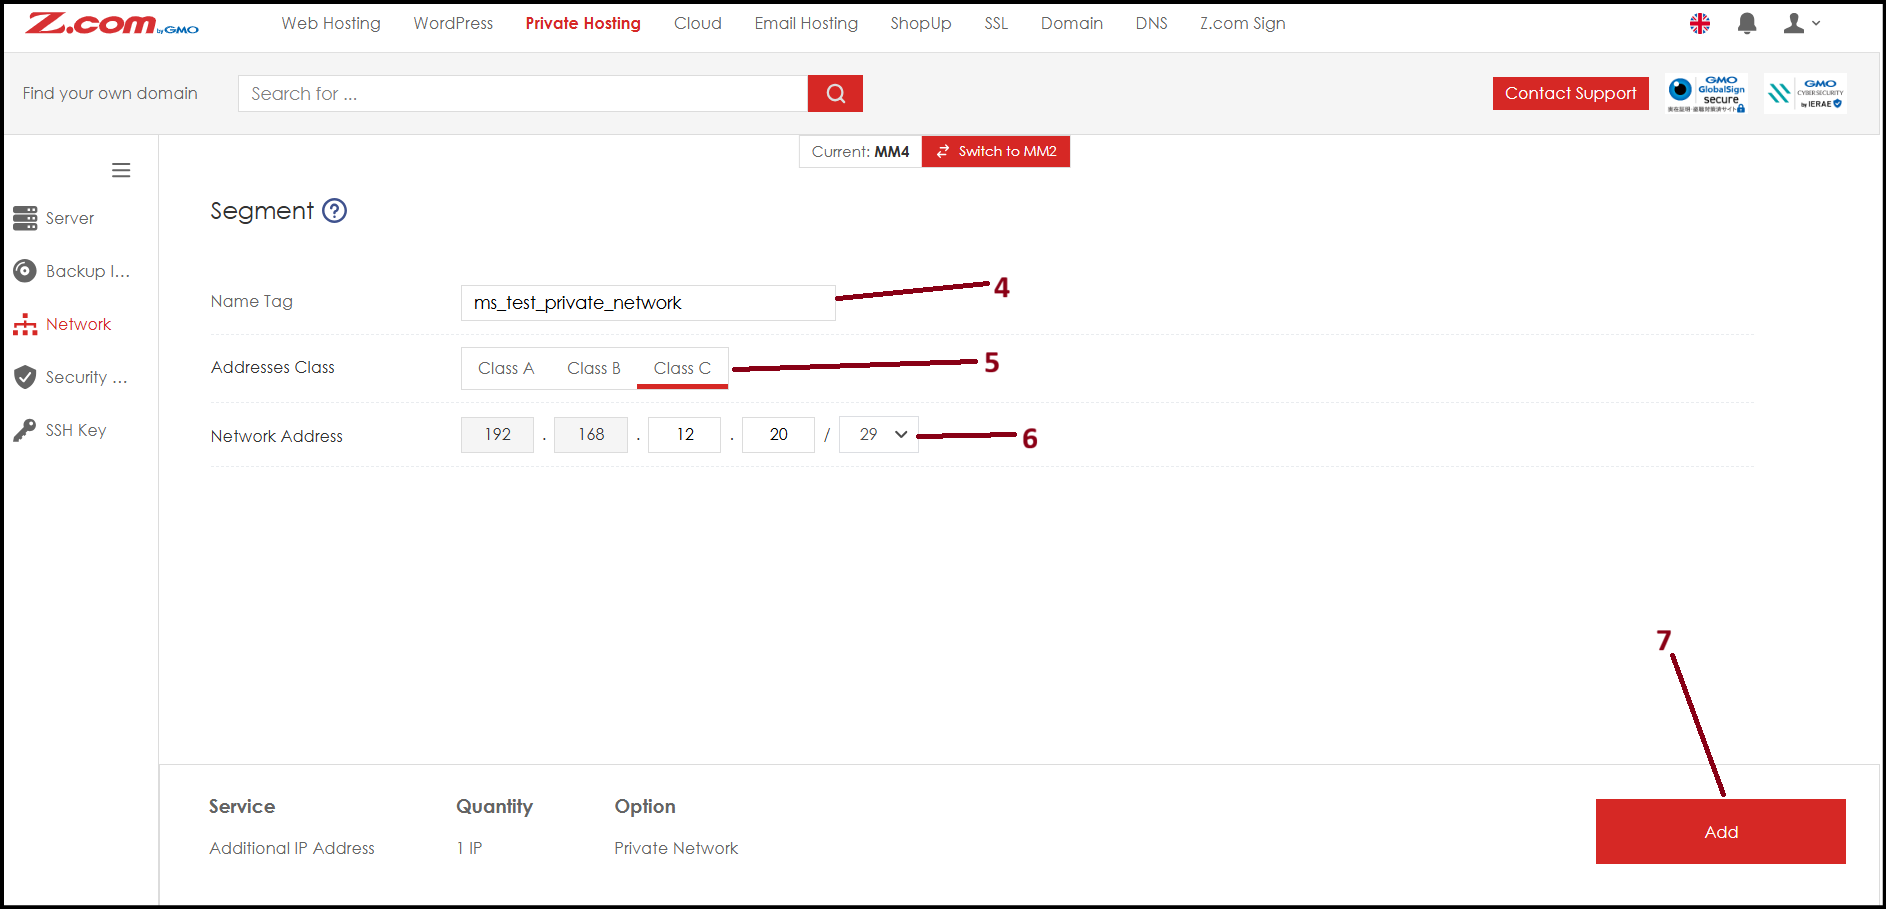
Step5. Now the usuable Private IP addresses are created. To assign to Private Hosting server interface, the server need to shutdown. To do so, click "Server" then choose server and click "Shutdown". 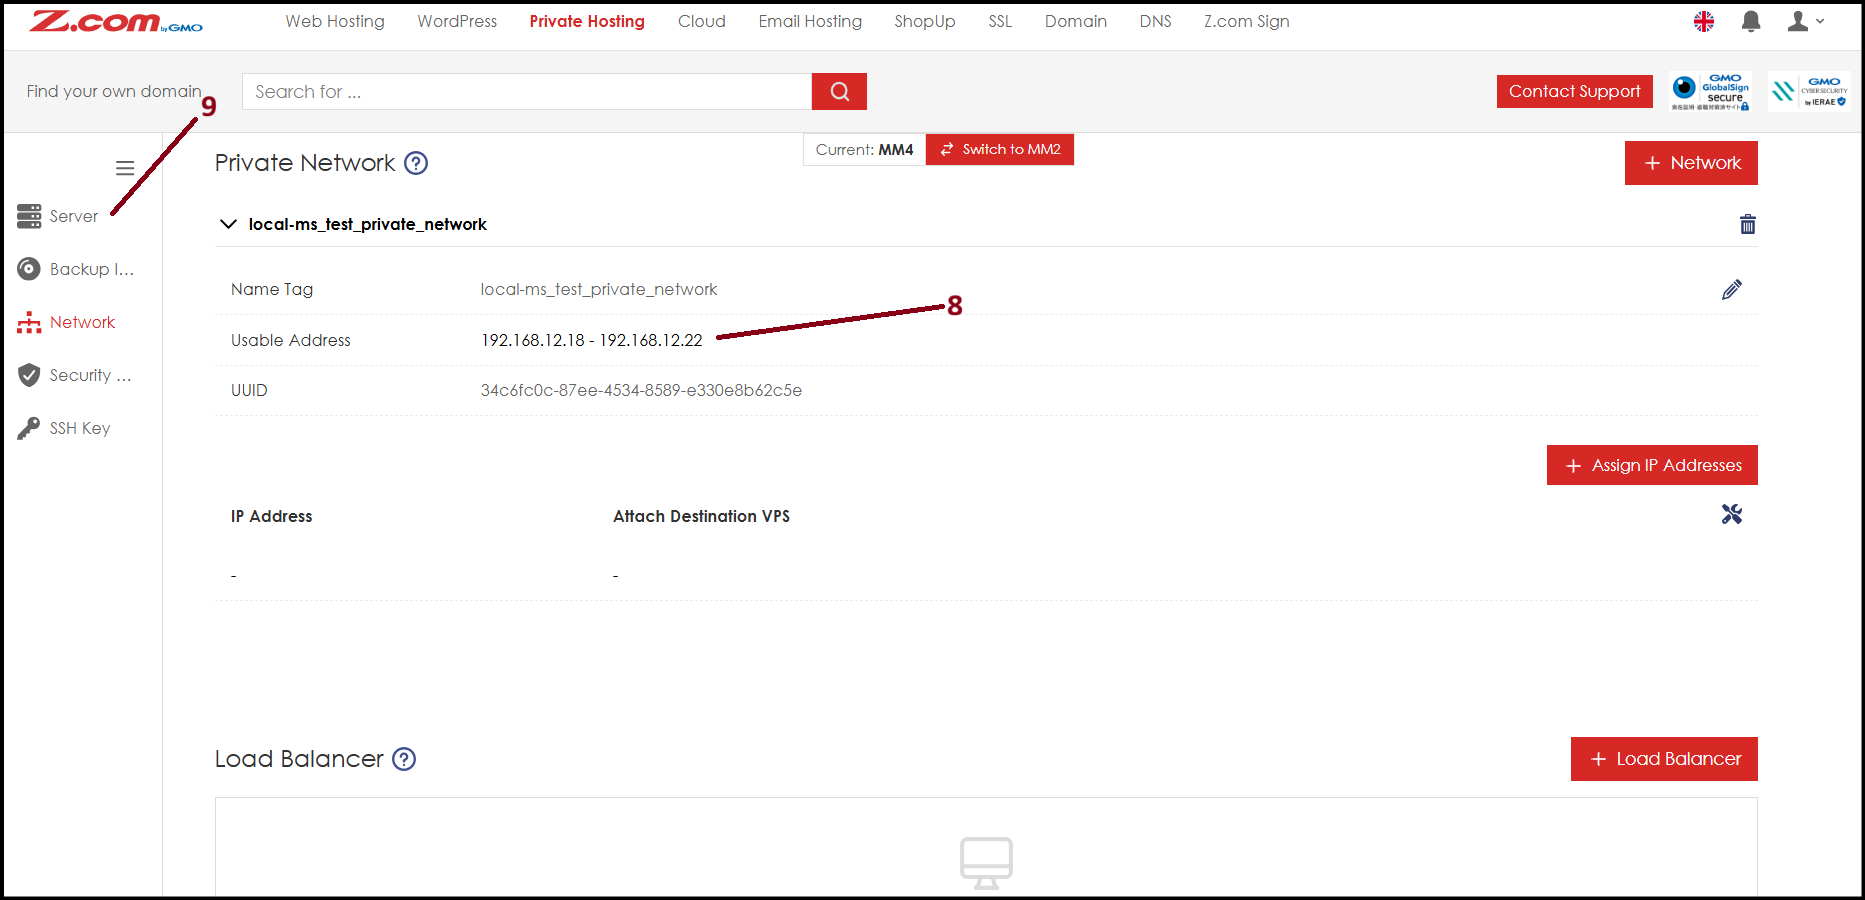
Step6. After server shutdown, click "Network Information". 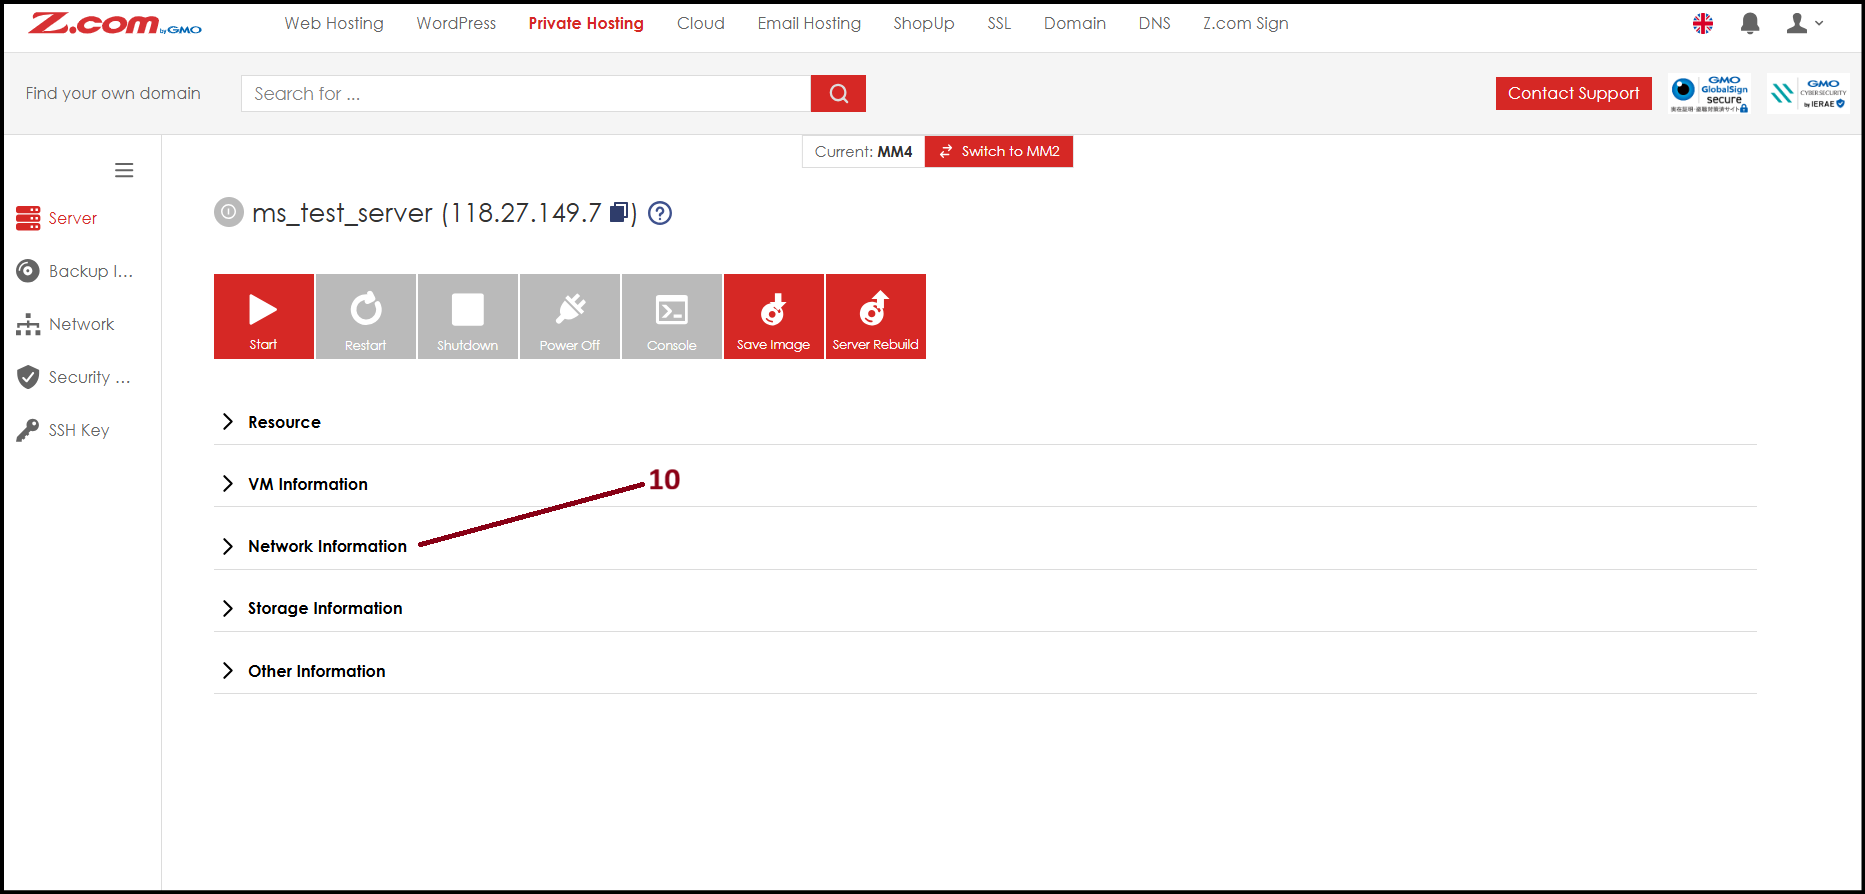
Step7. Clilck to "Private Network", choose "AccessPoint 3" settings icon. Now select Private IP address from "IP Address Range", select desire IP address from "Connect IP" and select "ALL" from "Security Group". After that click "Save". 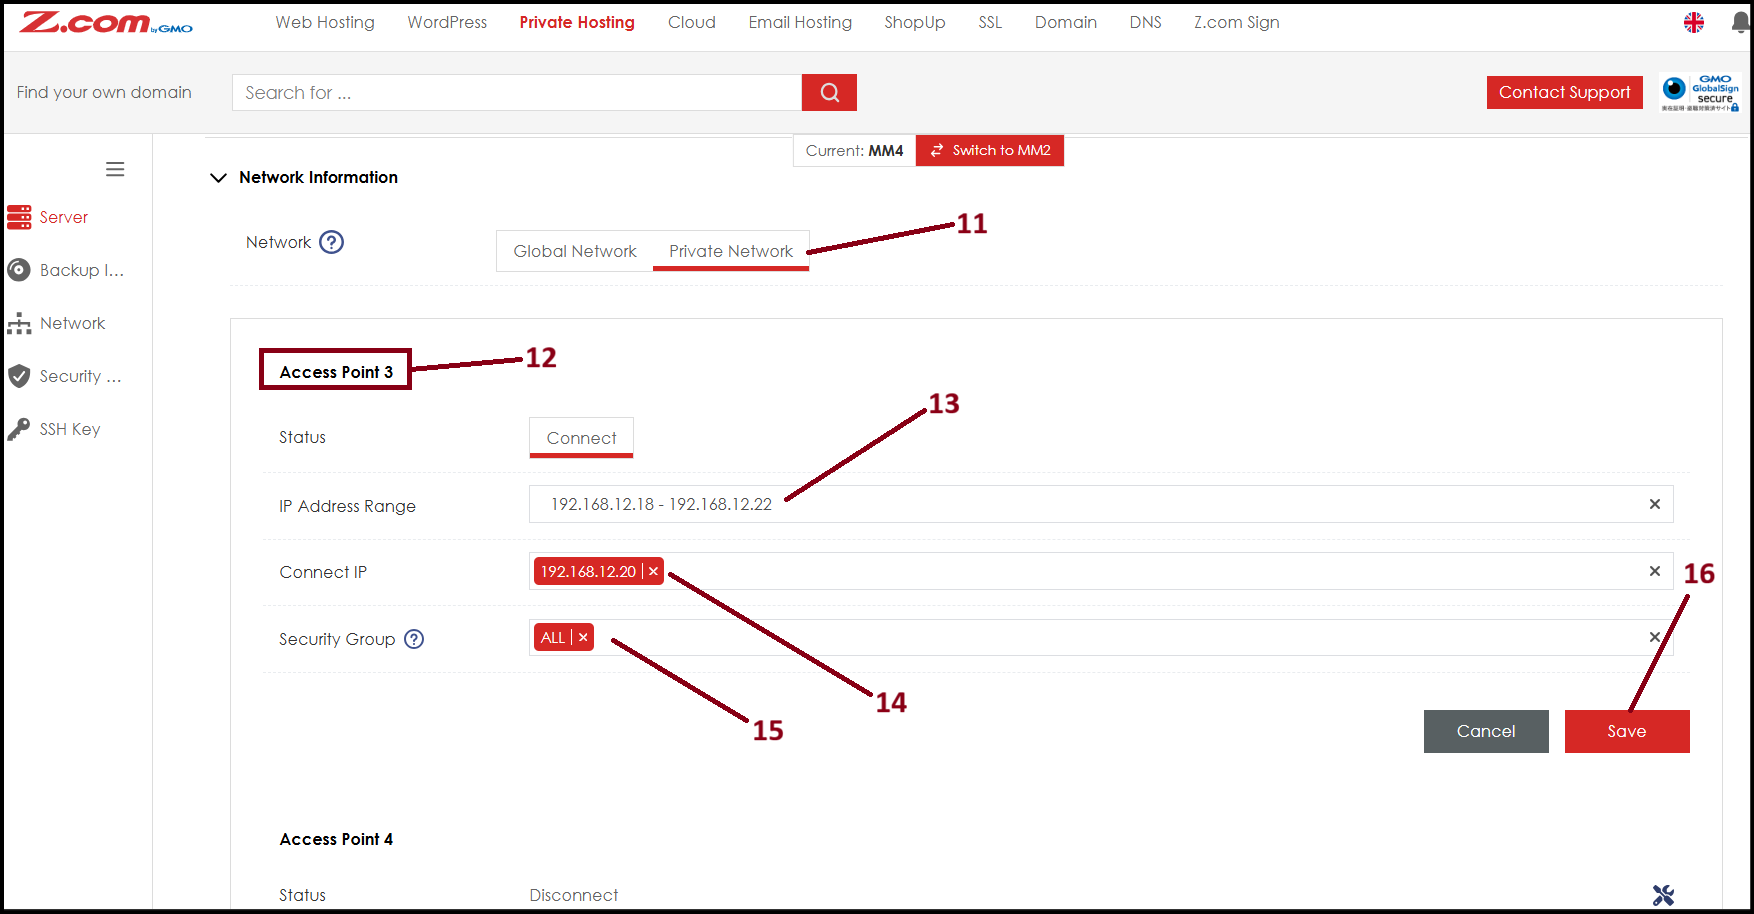
Step8. Now the Private IP address is also assigned to "AccessPoint 3" VPS interface. You can now start the server again. To use in server, you need to configure Private IP address inside the VPS server also. The configuration process may vary depending on the server OS. 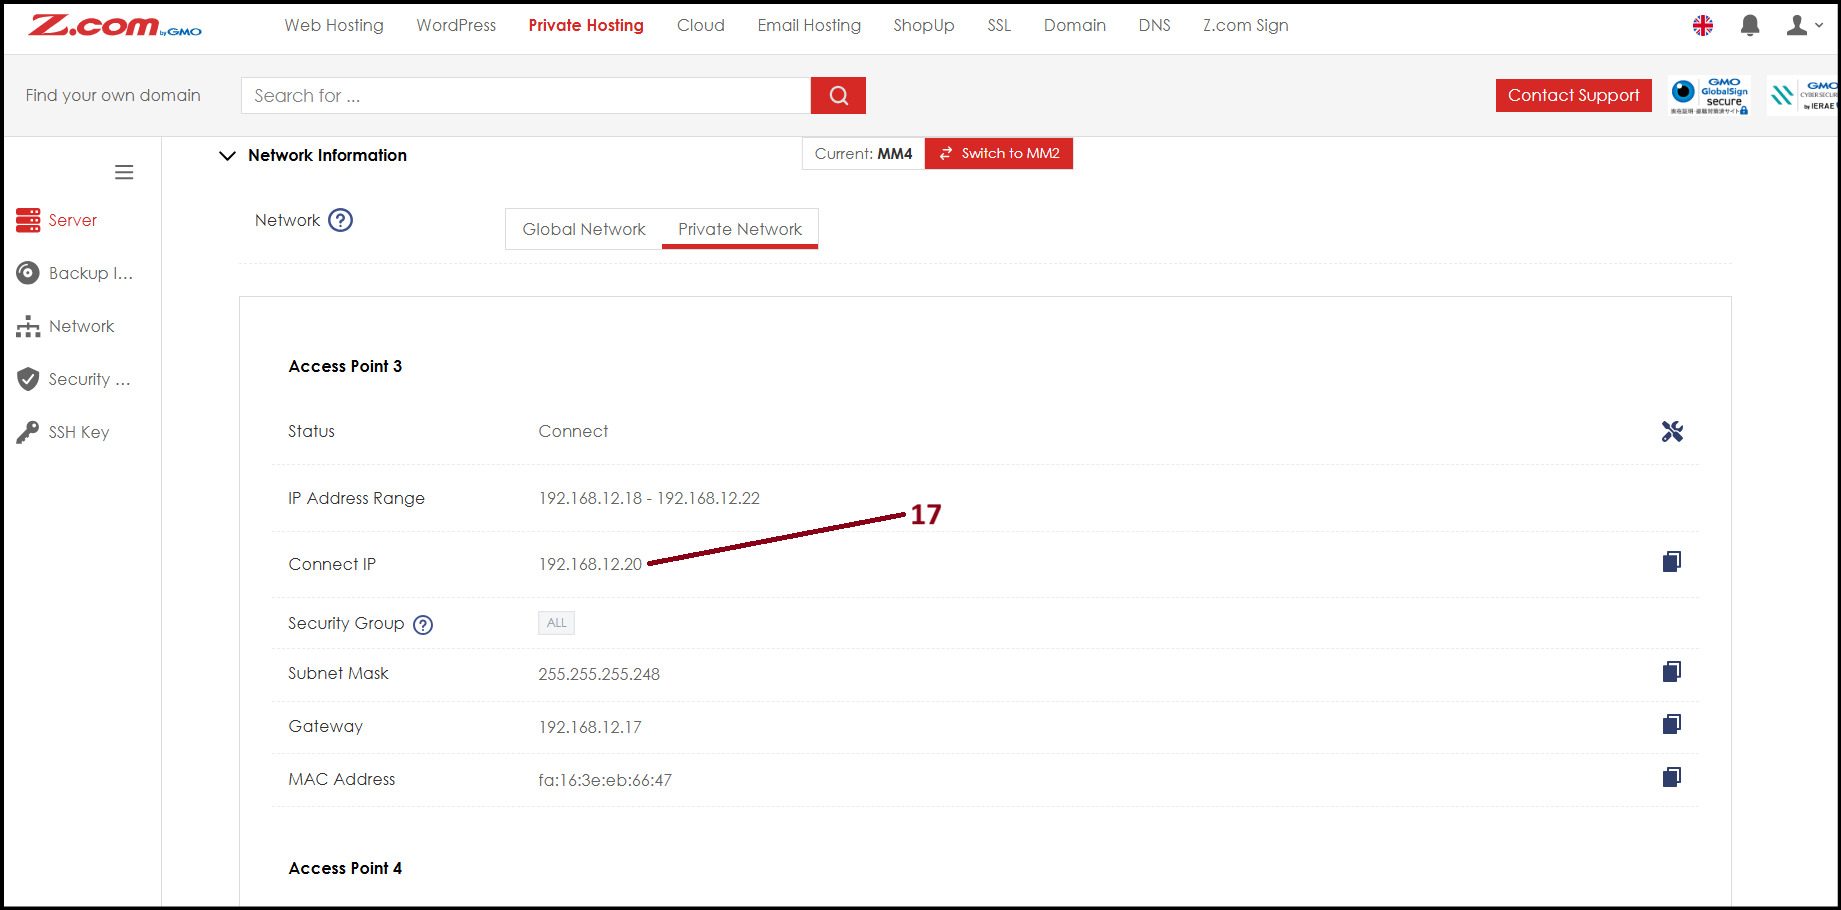
Thank You!
Was this article helpful?
That’s Great!
Thank you for your feedback
Sorry! We couldn't be helpful
Thank you for your feedback
Feedback sent
We appreciate your effort and will try to fix the article